Mitten Pattern

Waffle Knit Mittens – free pattern and knitting kit!

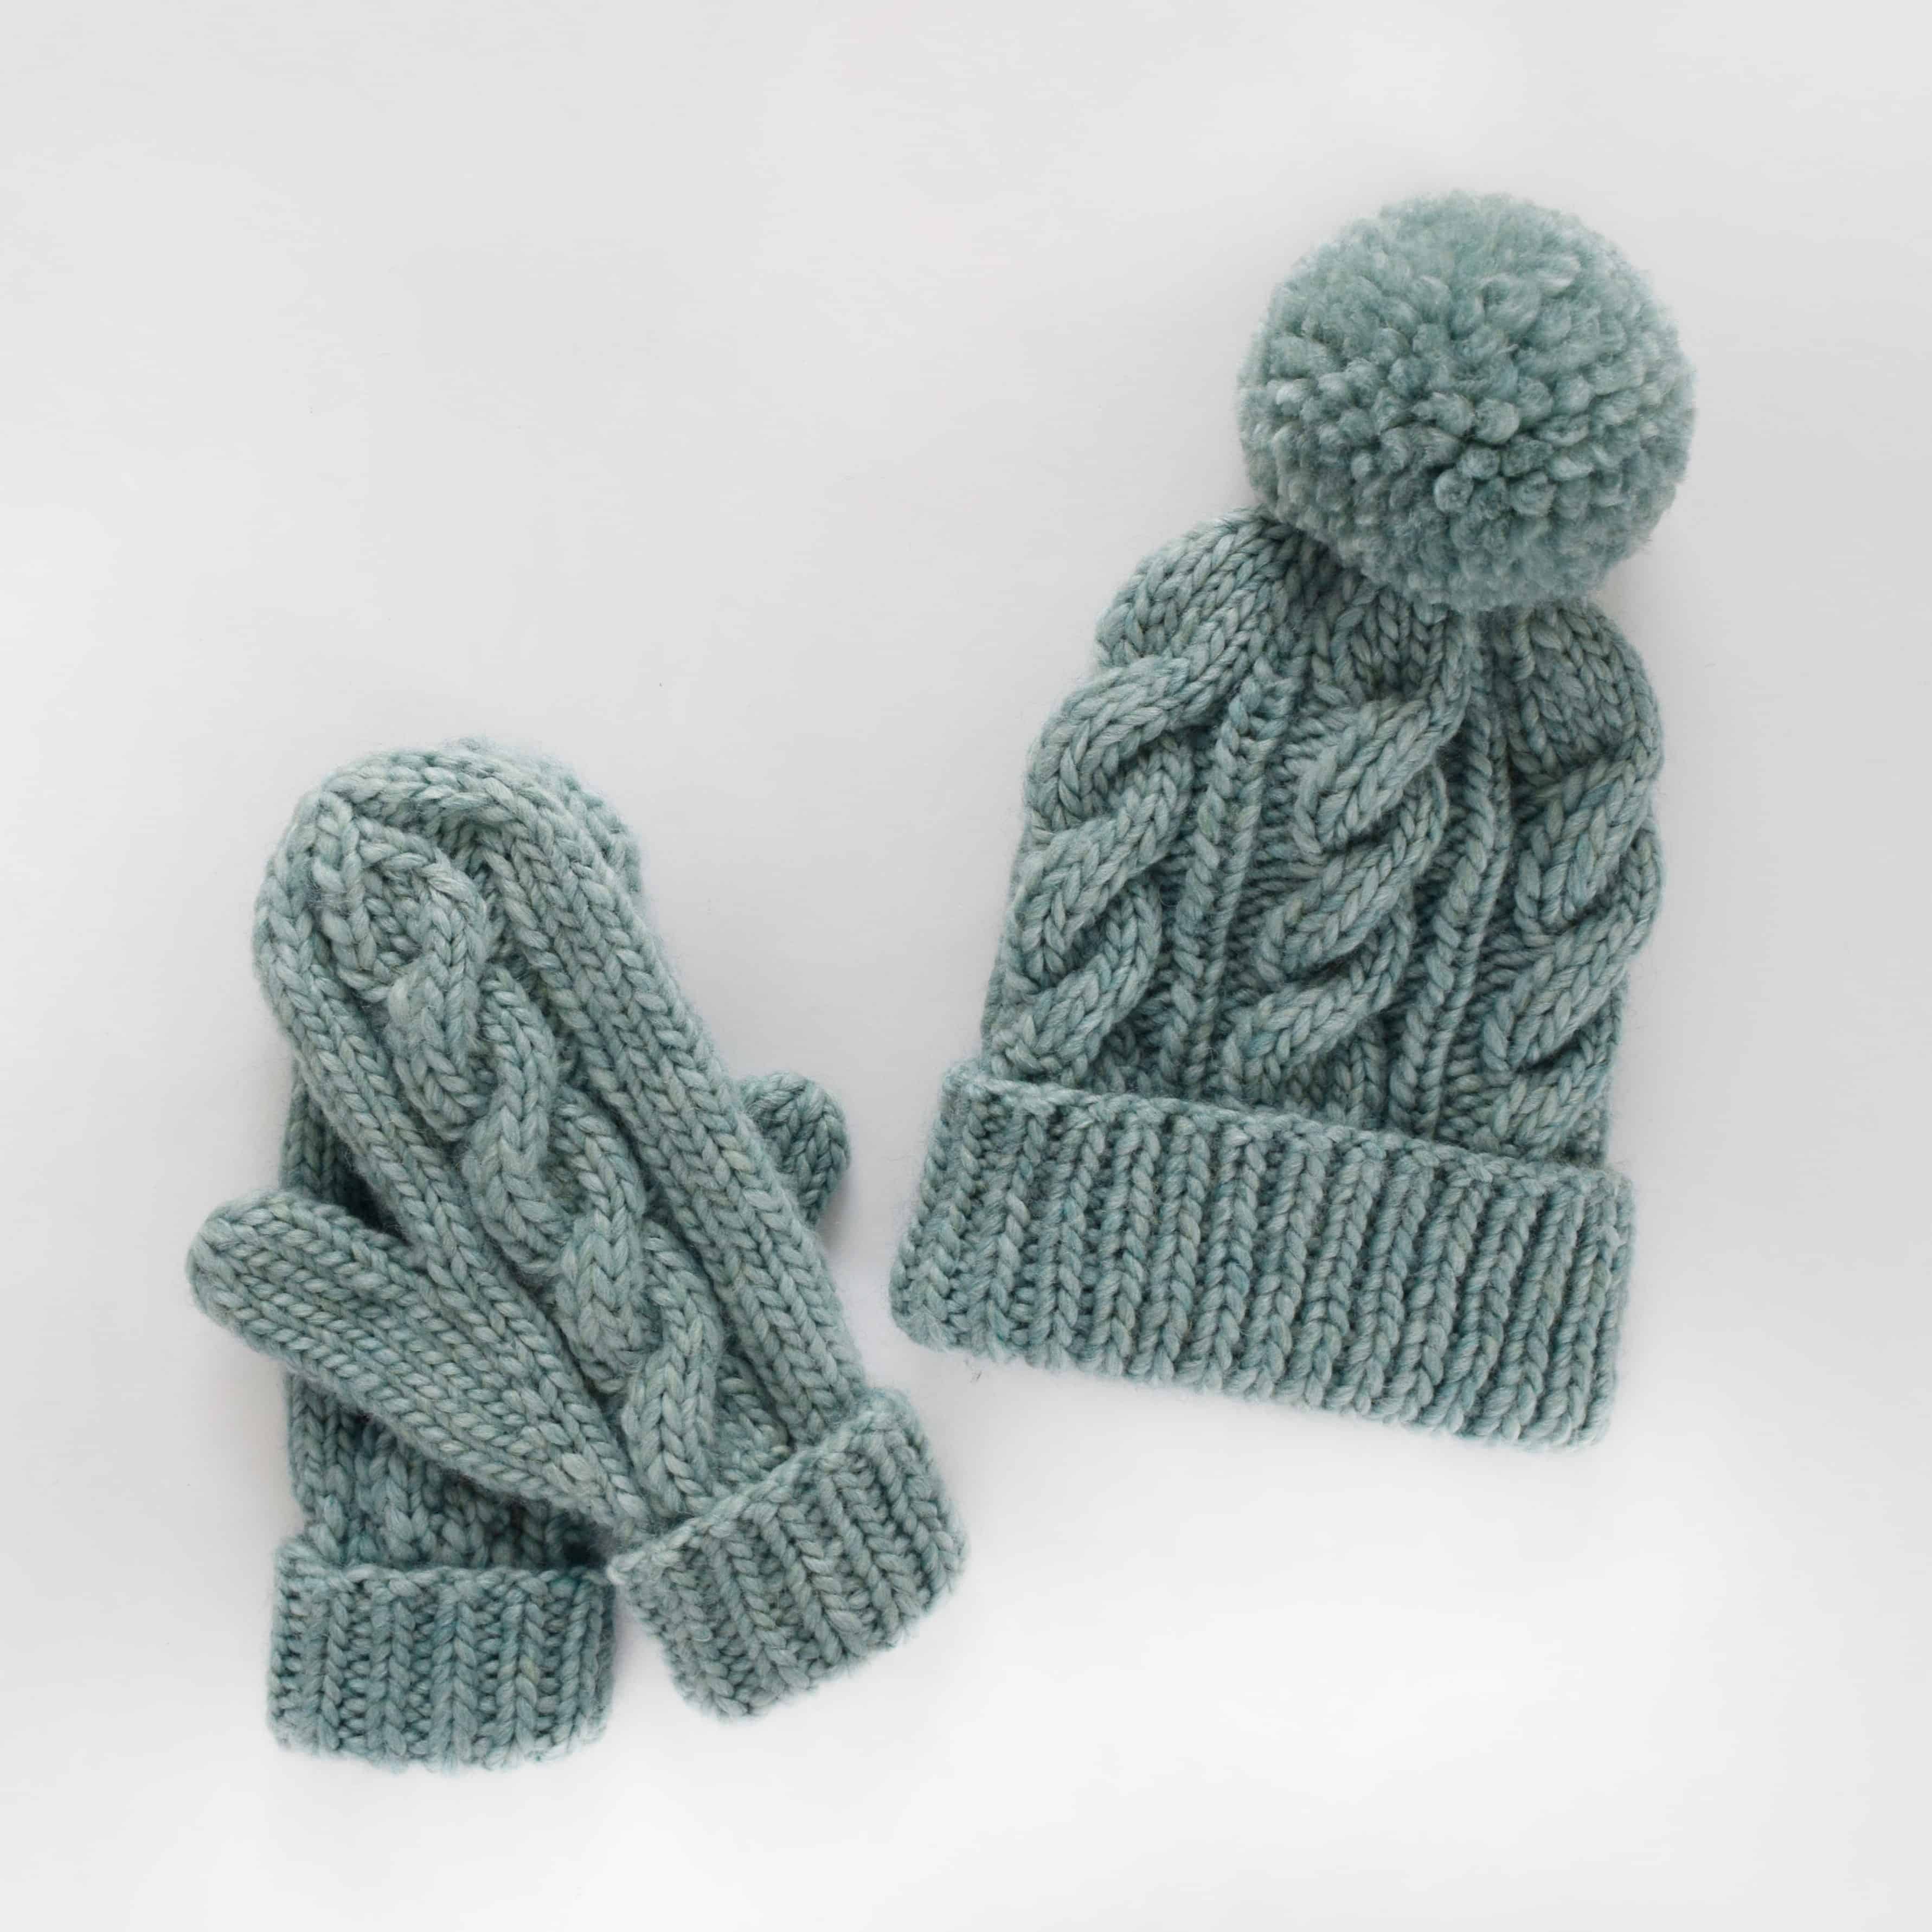
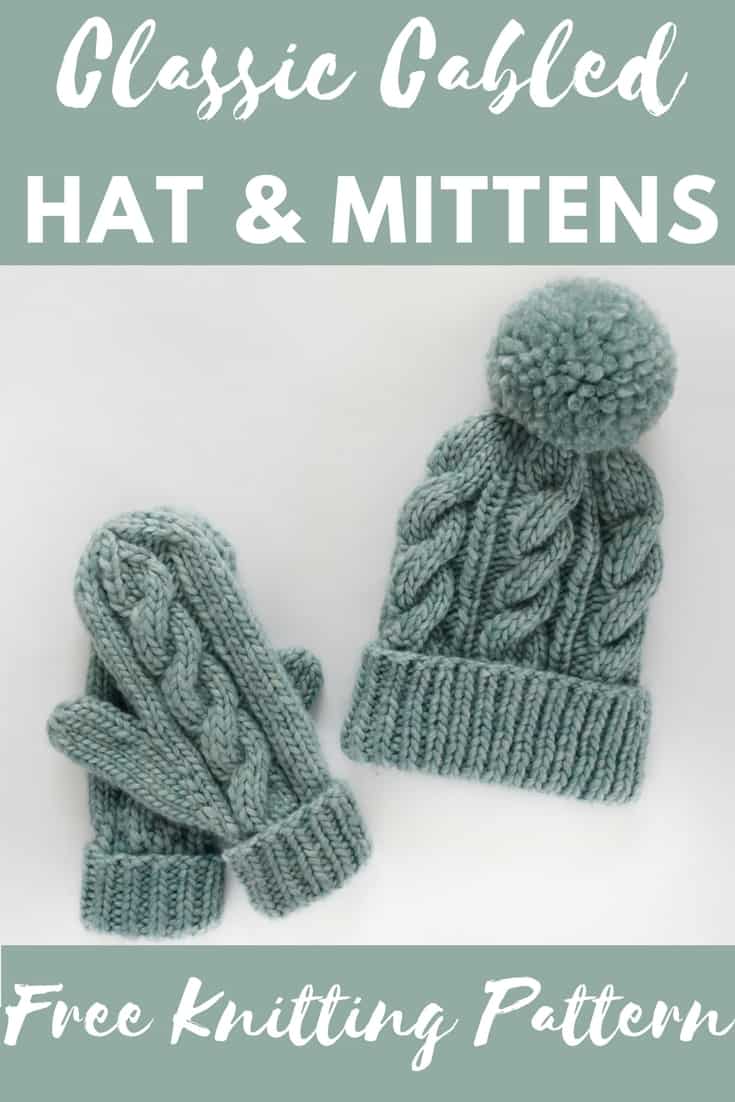
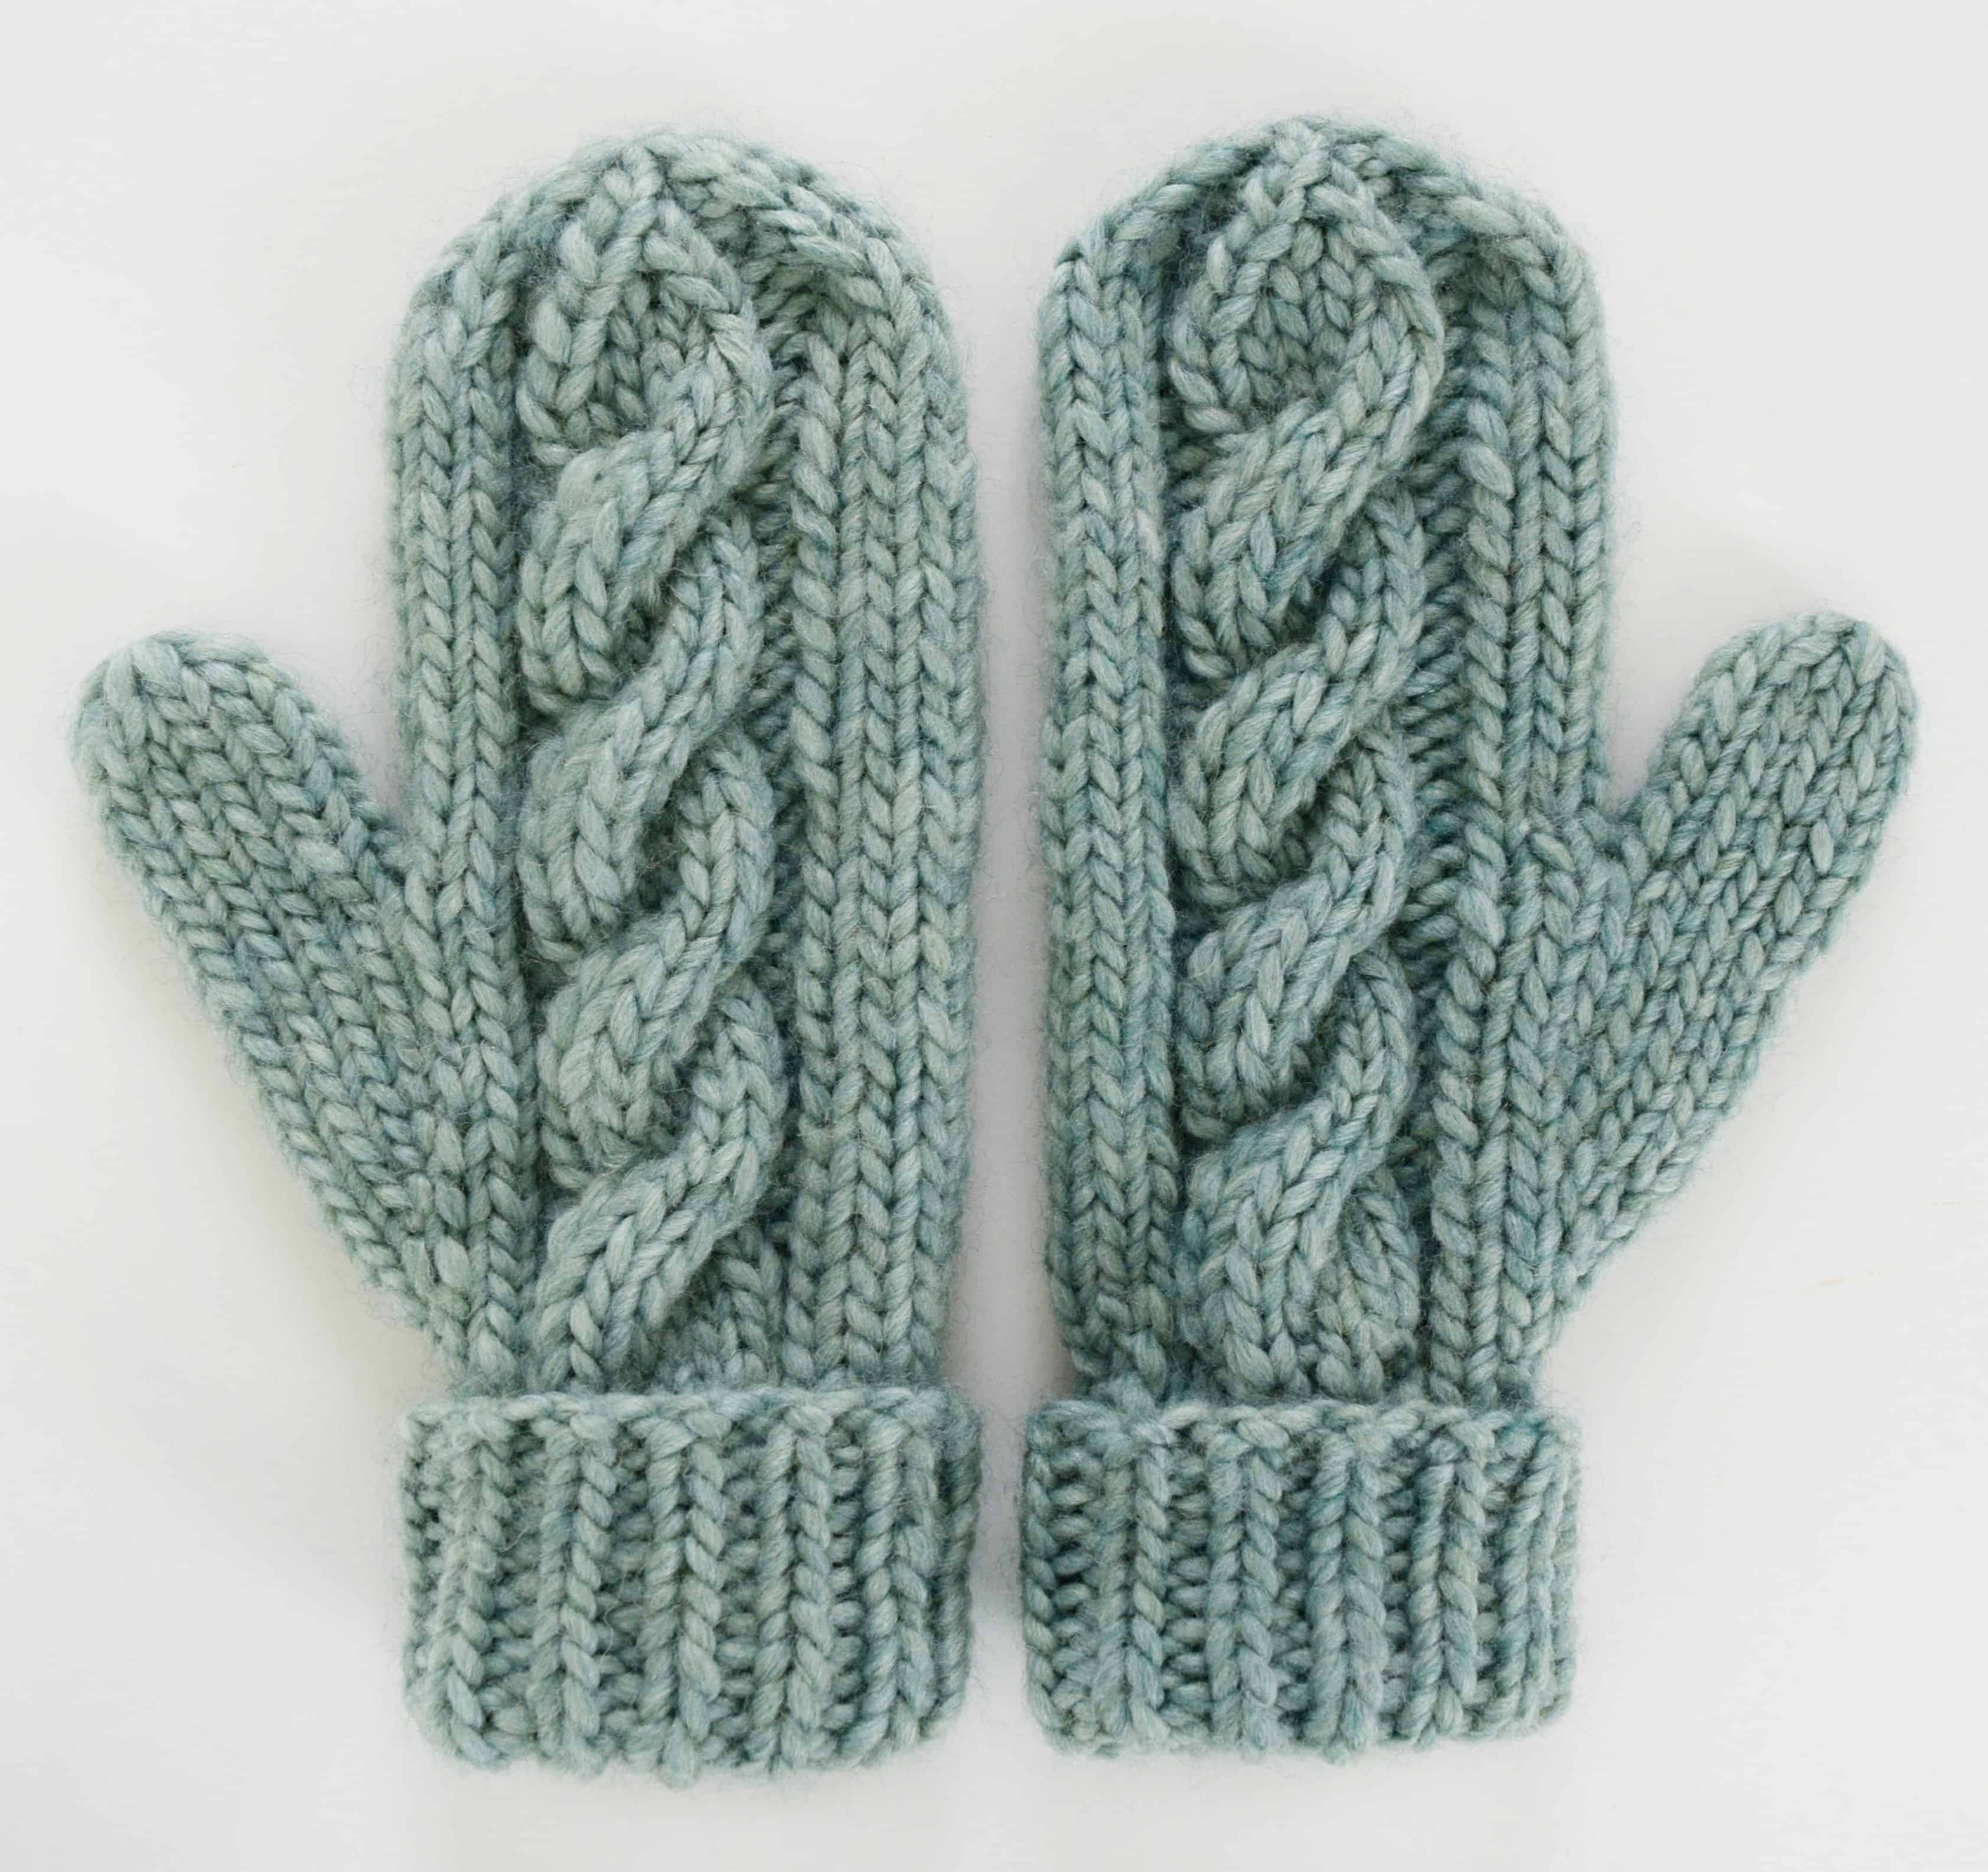
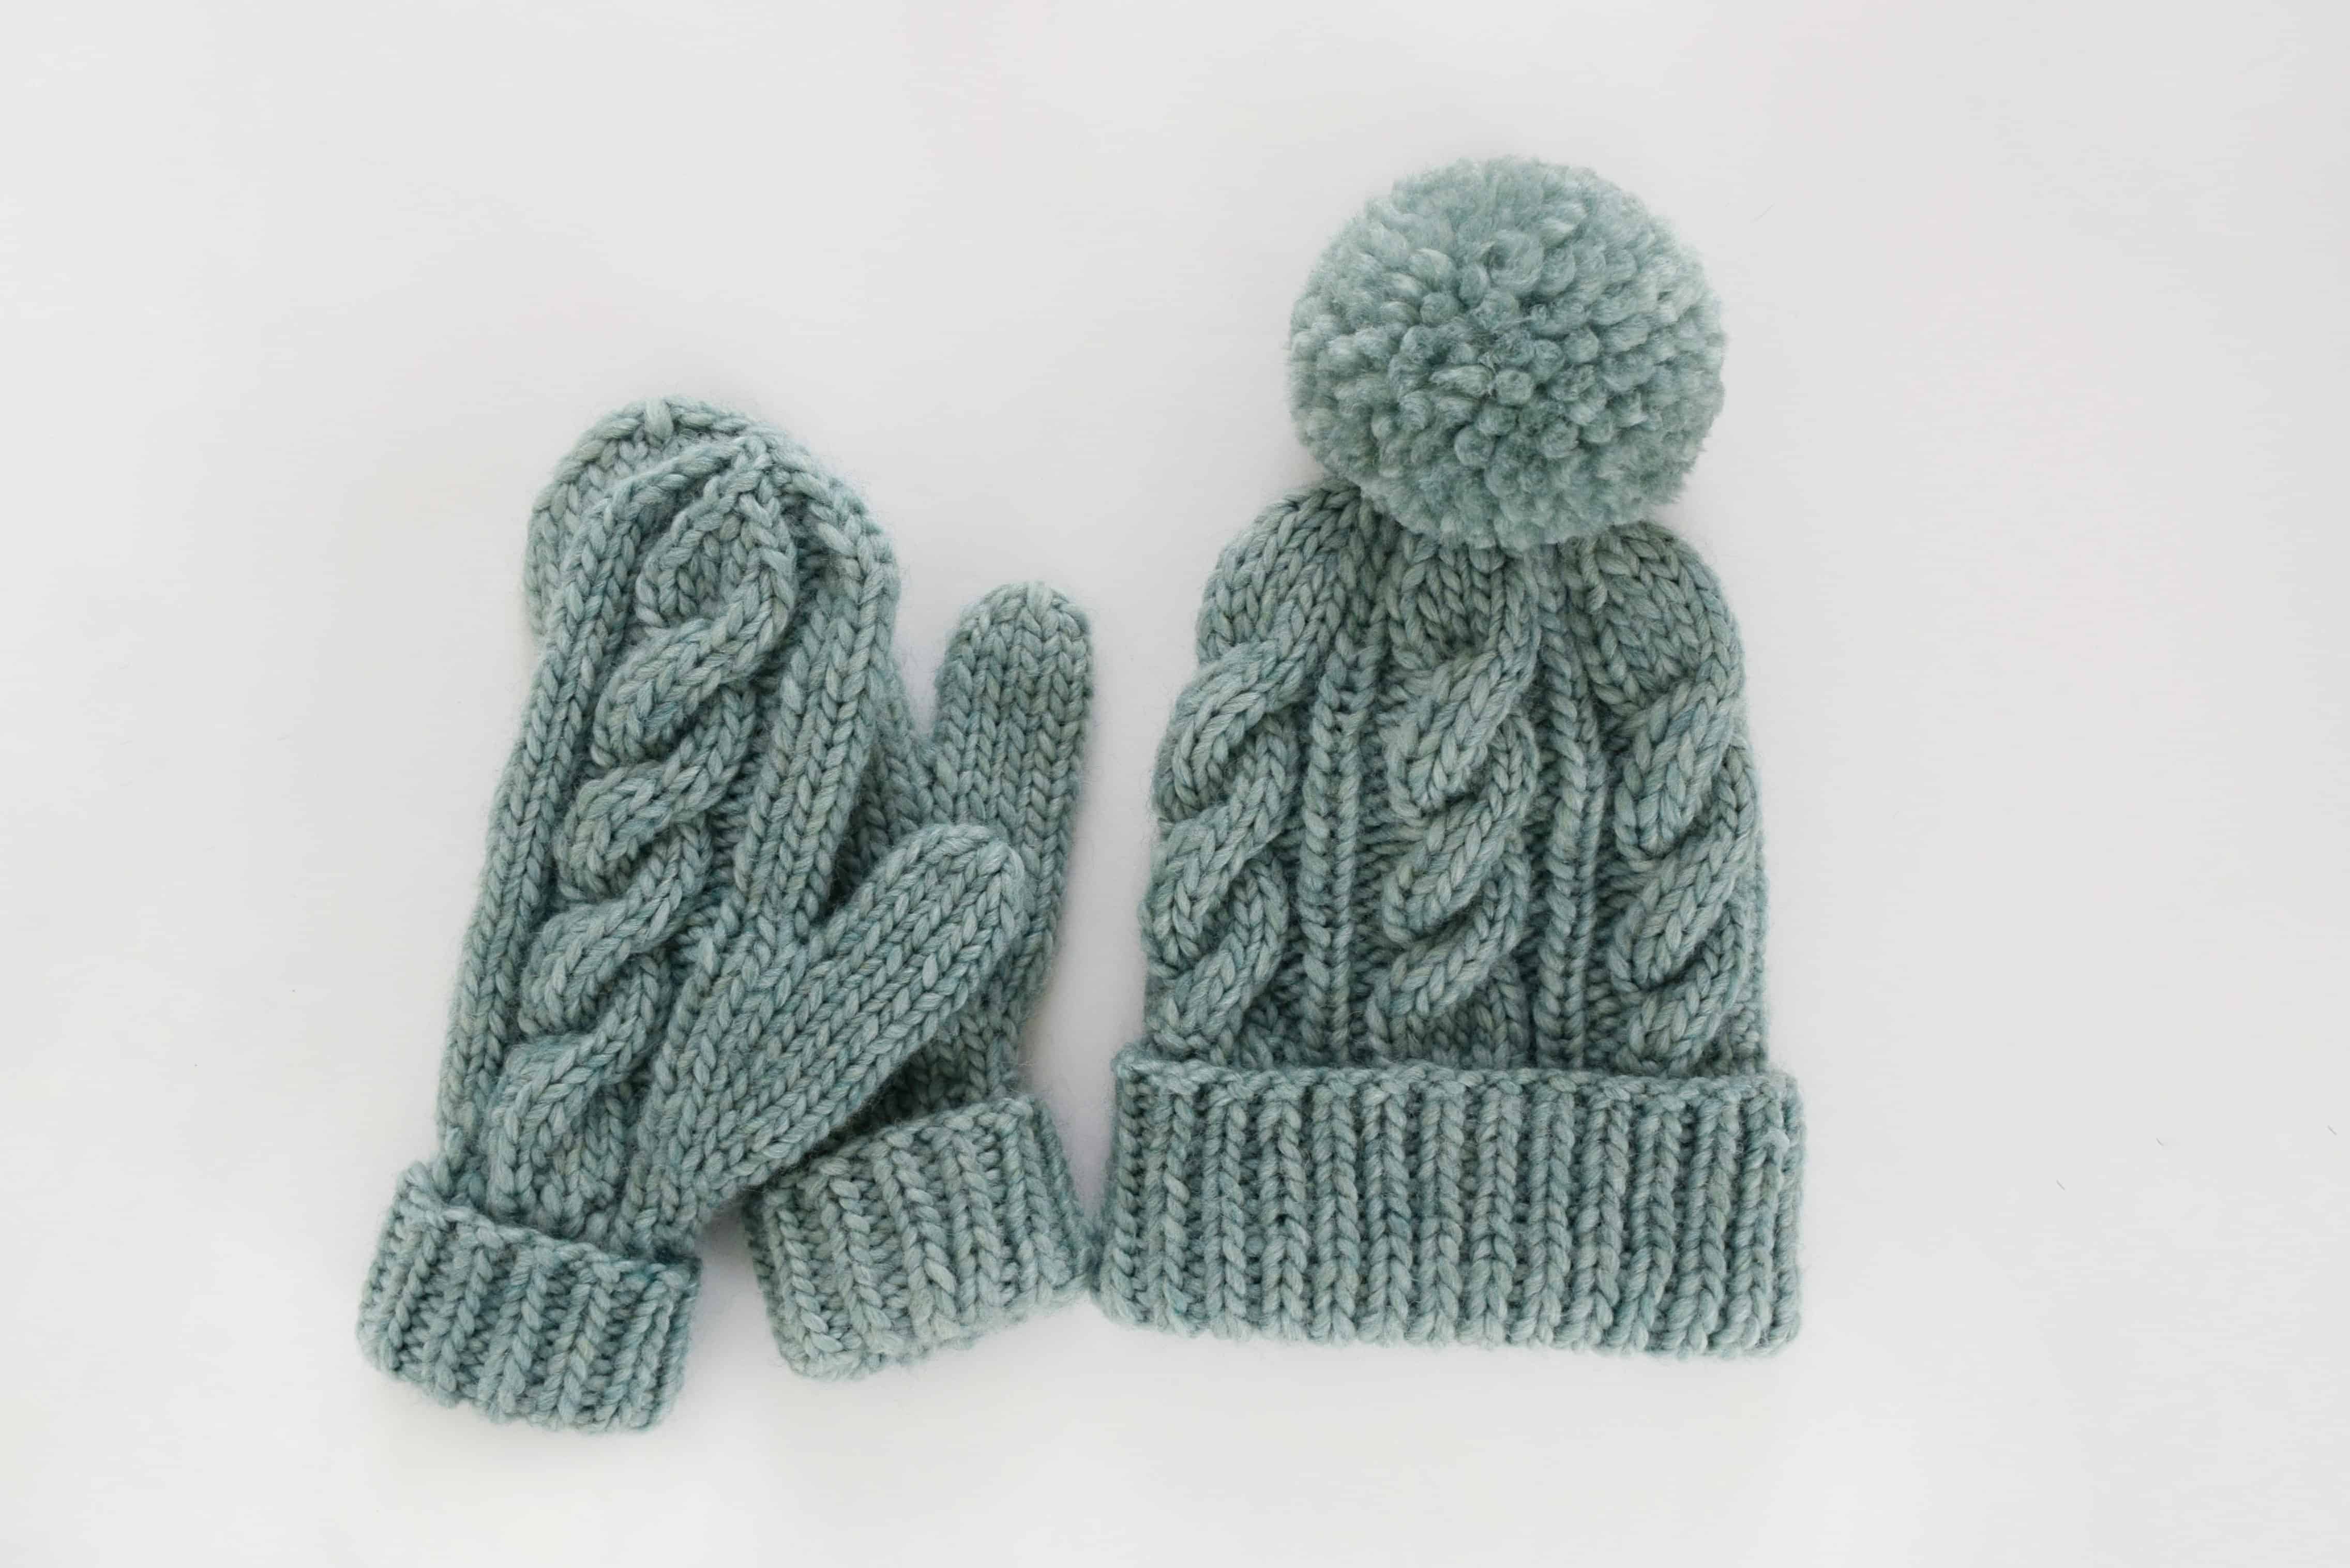
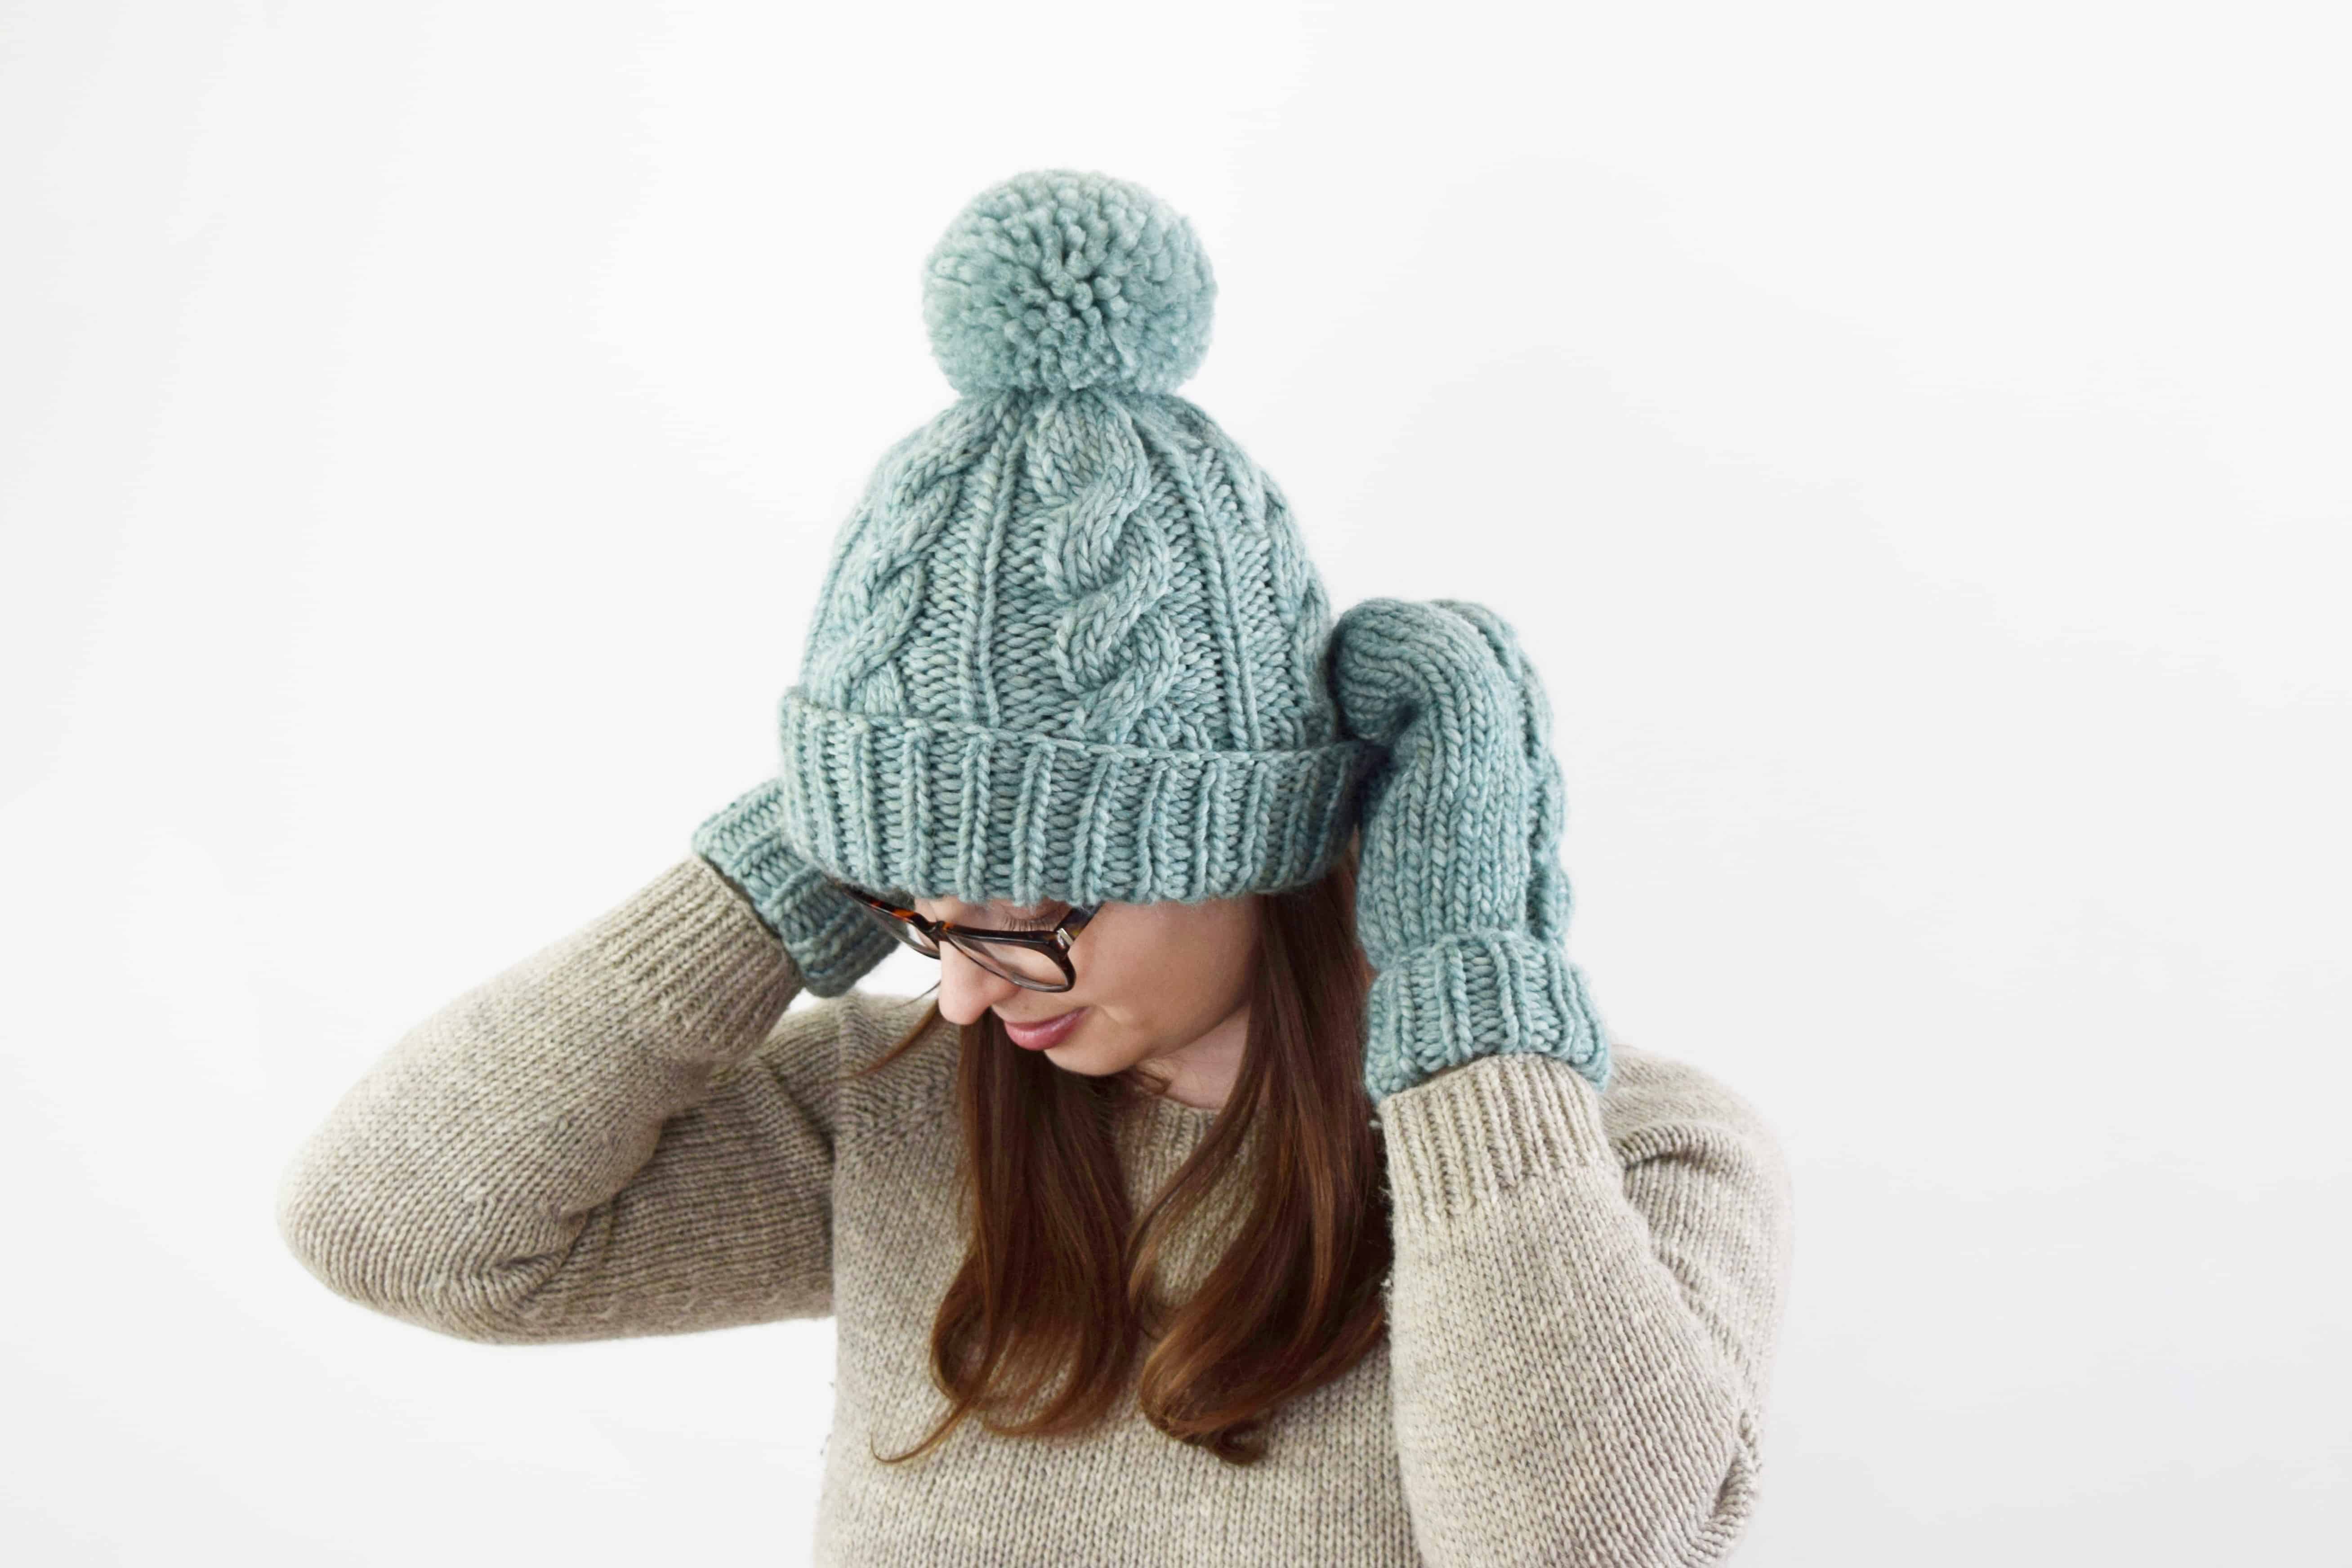
Hey friends! Who’s ready to knit these warm and cozy Waffle Knit Mittens? 🙋‍♀️

Cozy Waffle Knit Mittens in rich hues, showcasing a textured pattern and crafted with Hue and Me yarn. Ideal winter accessory for warmth and style, available in four sizes from child to adult. Perfect for chilly days and handmade comfort.

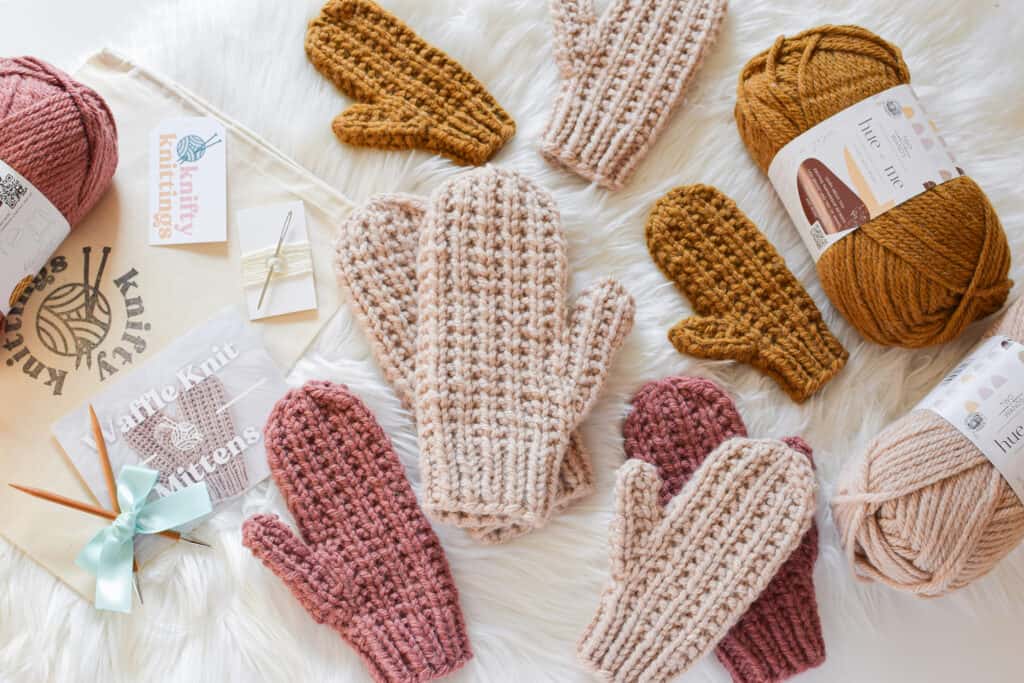
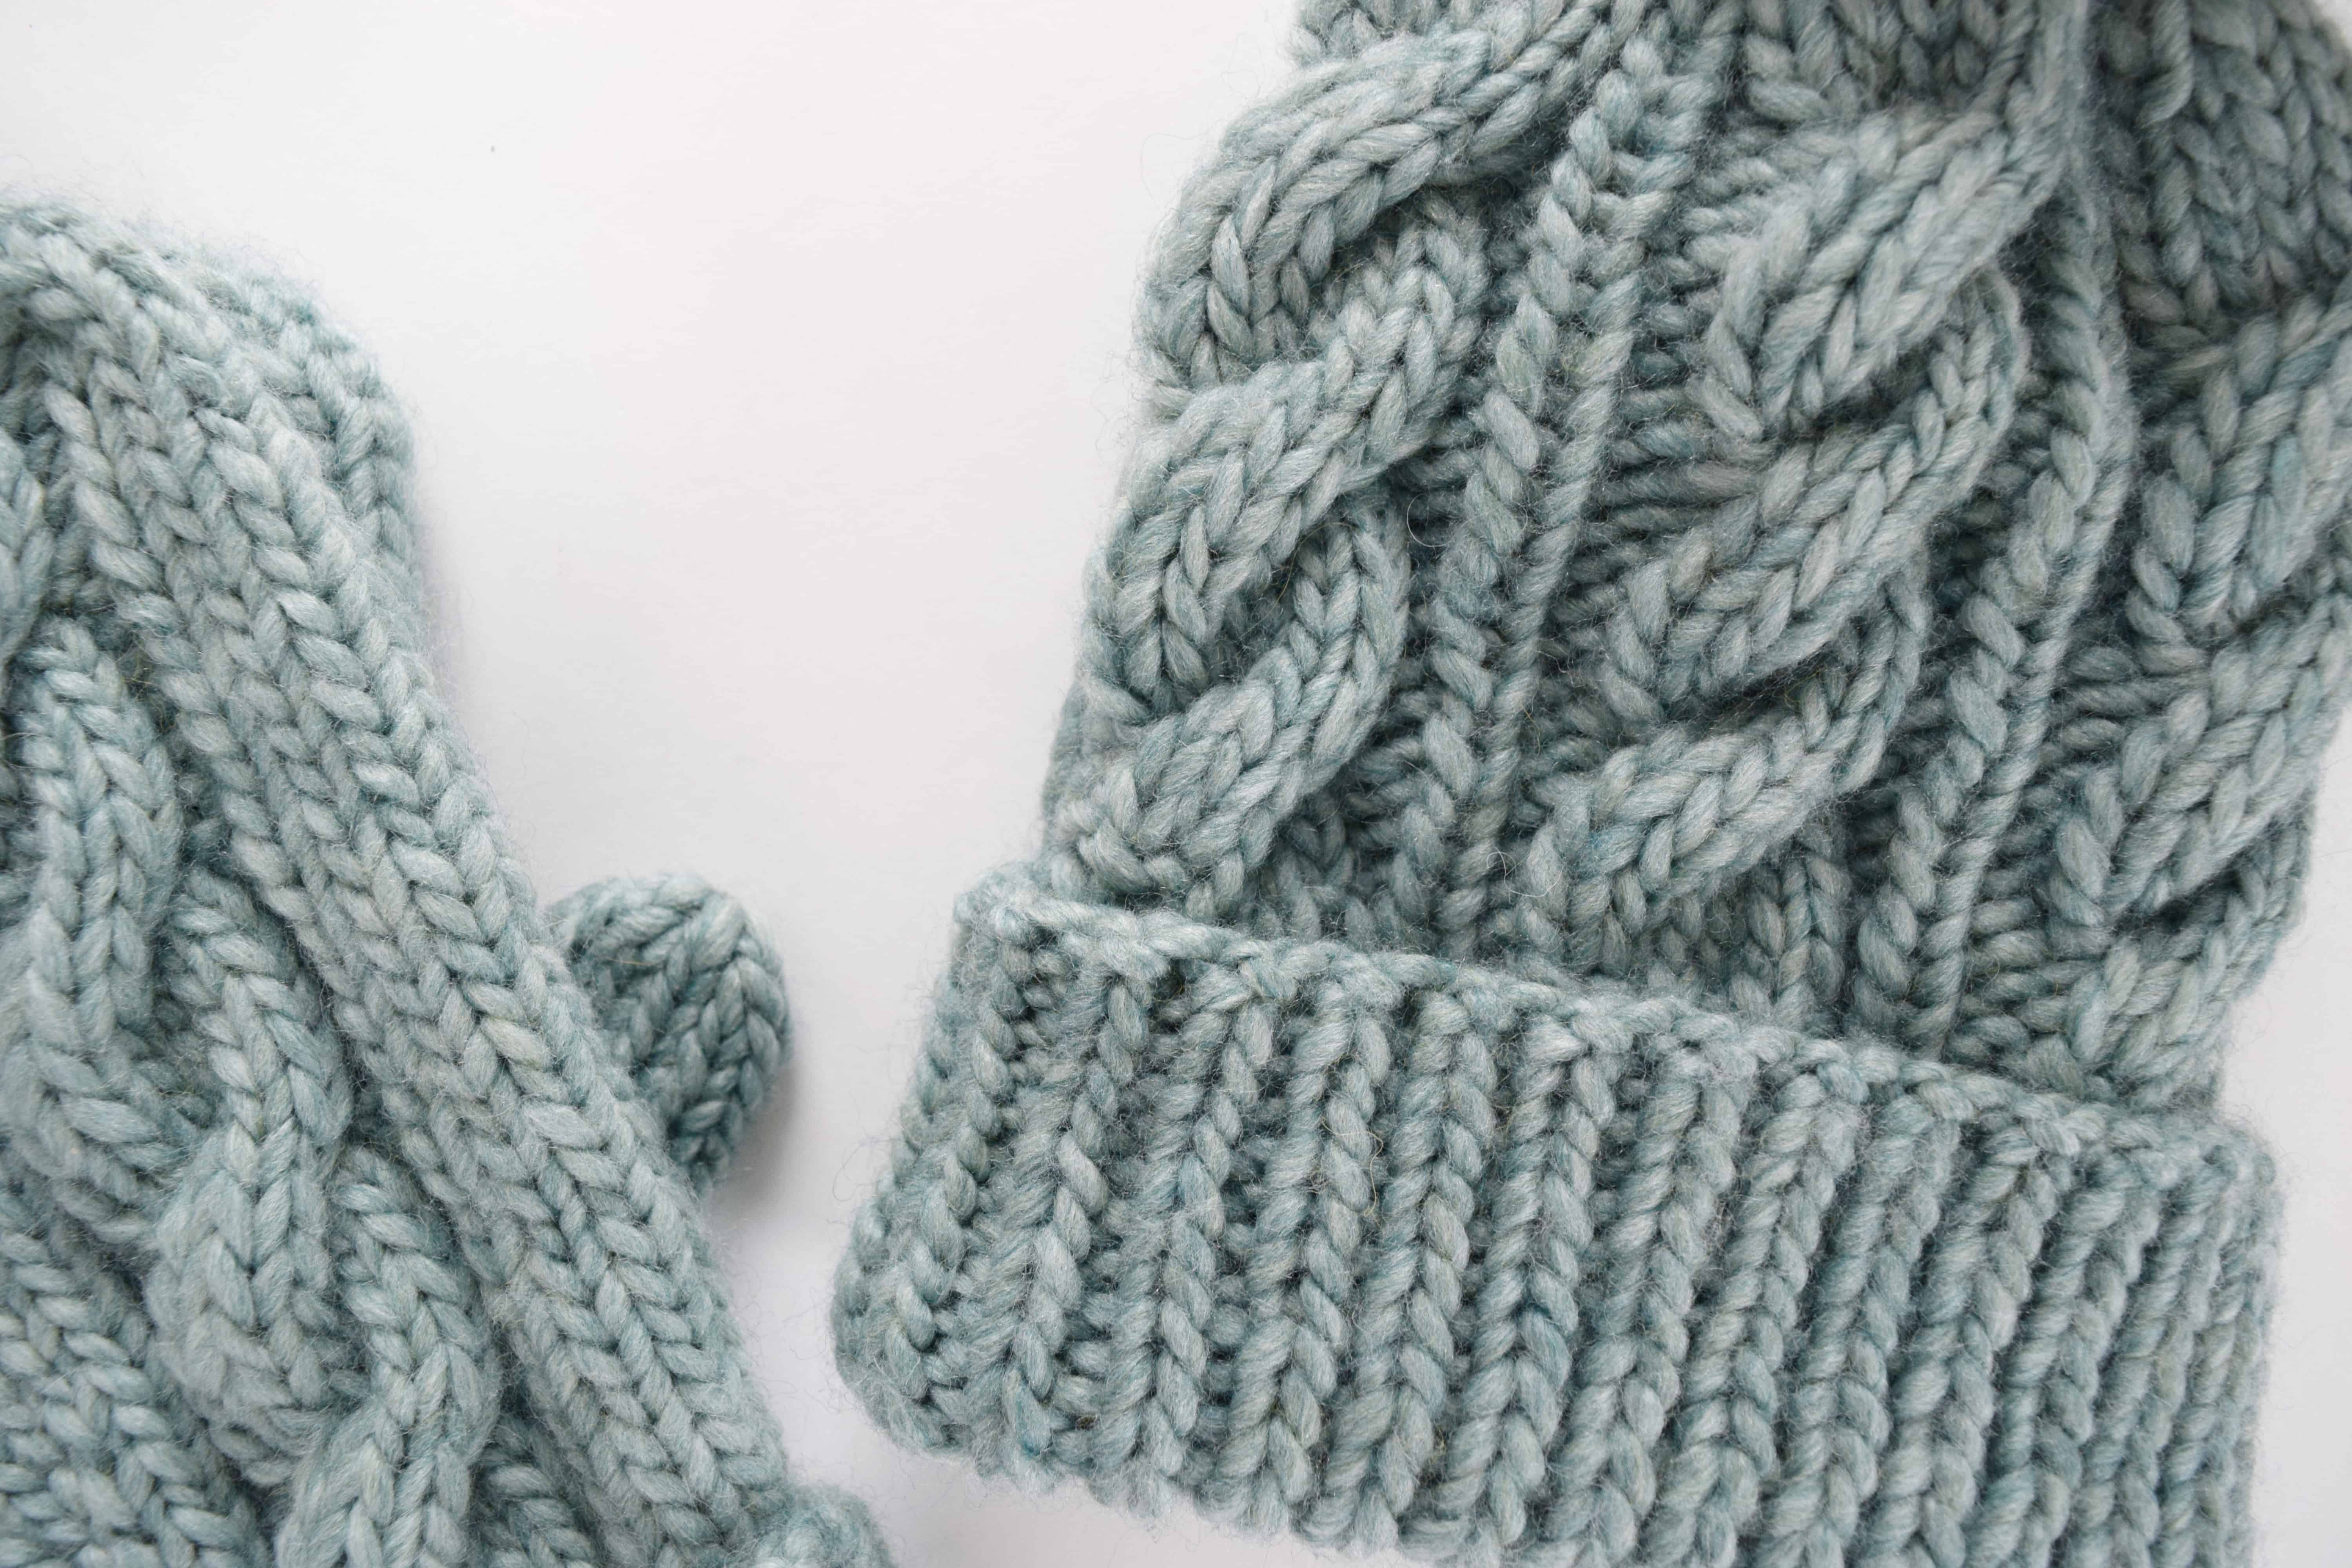
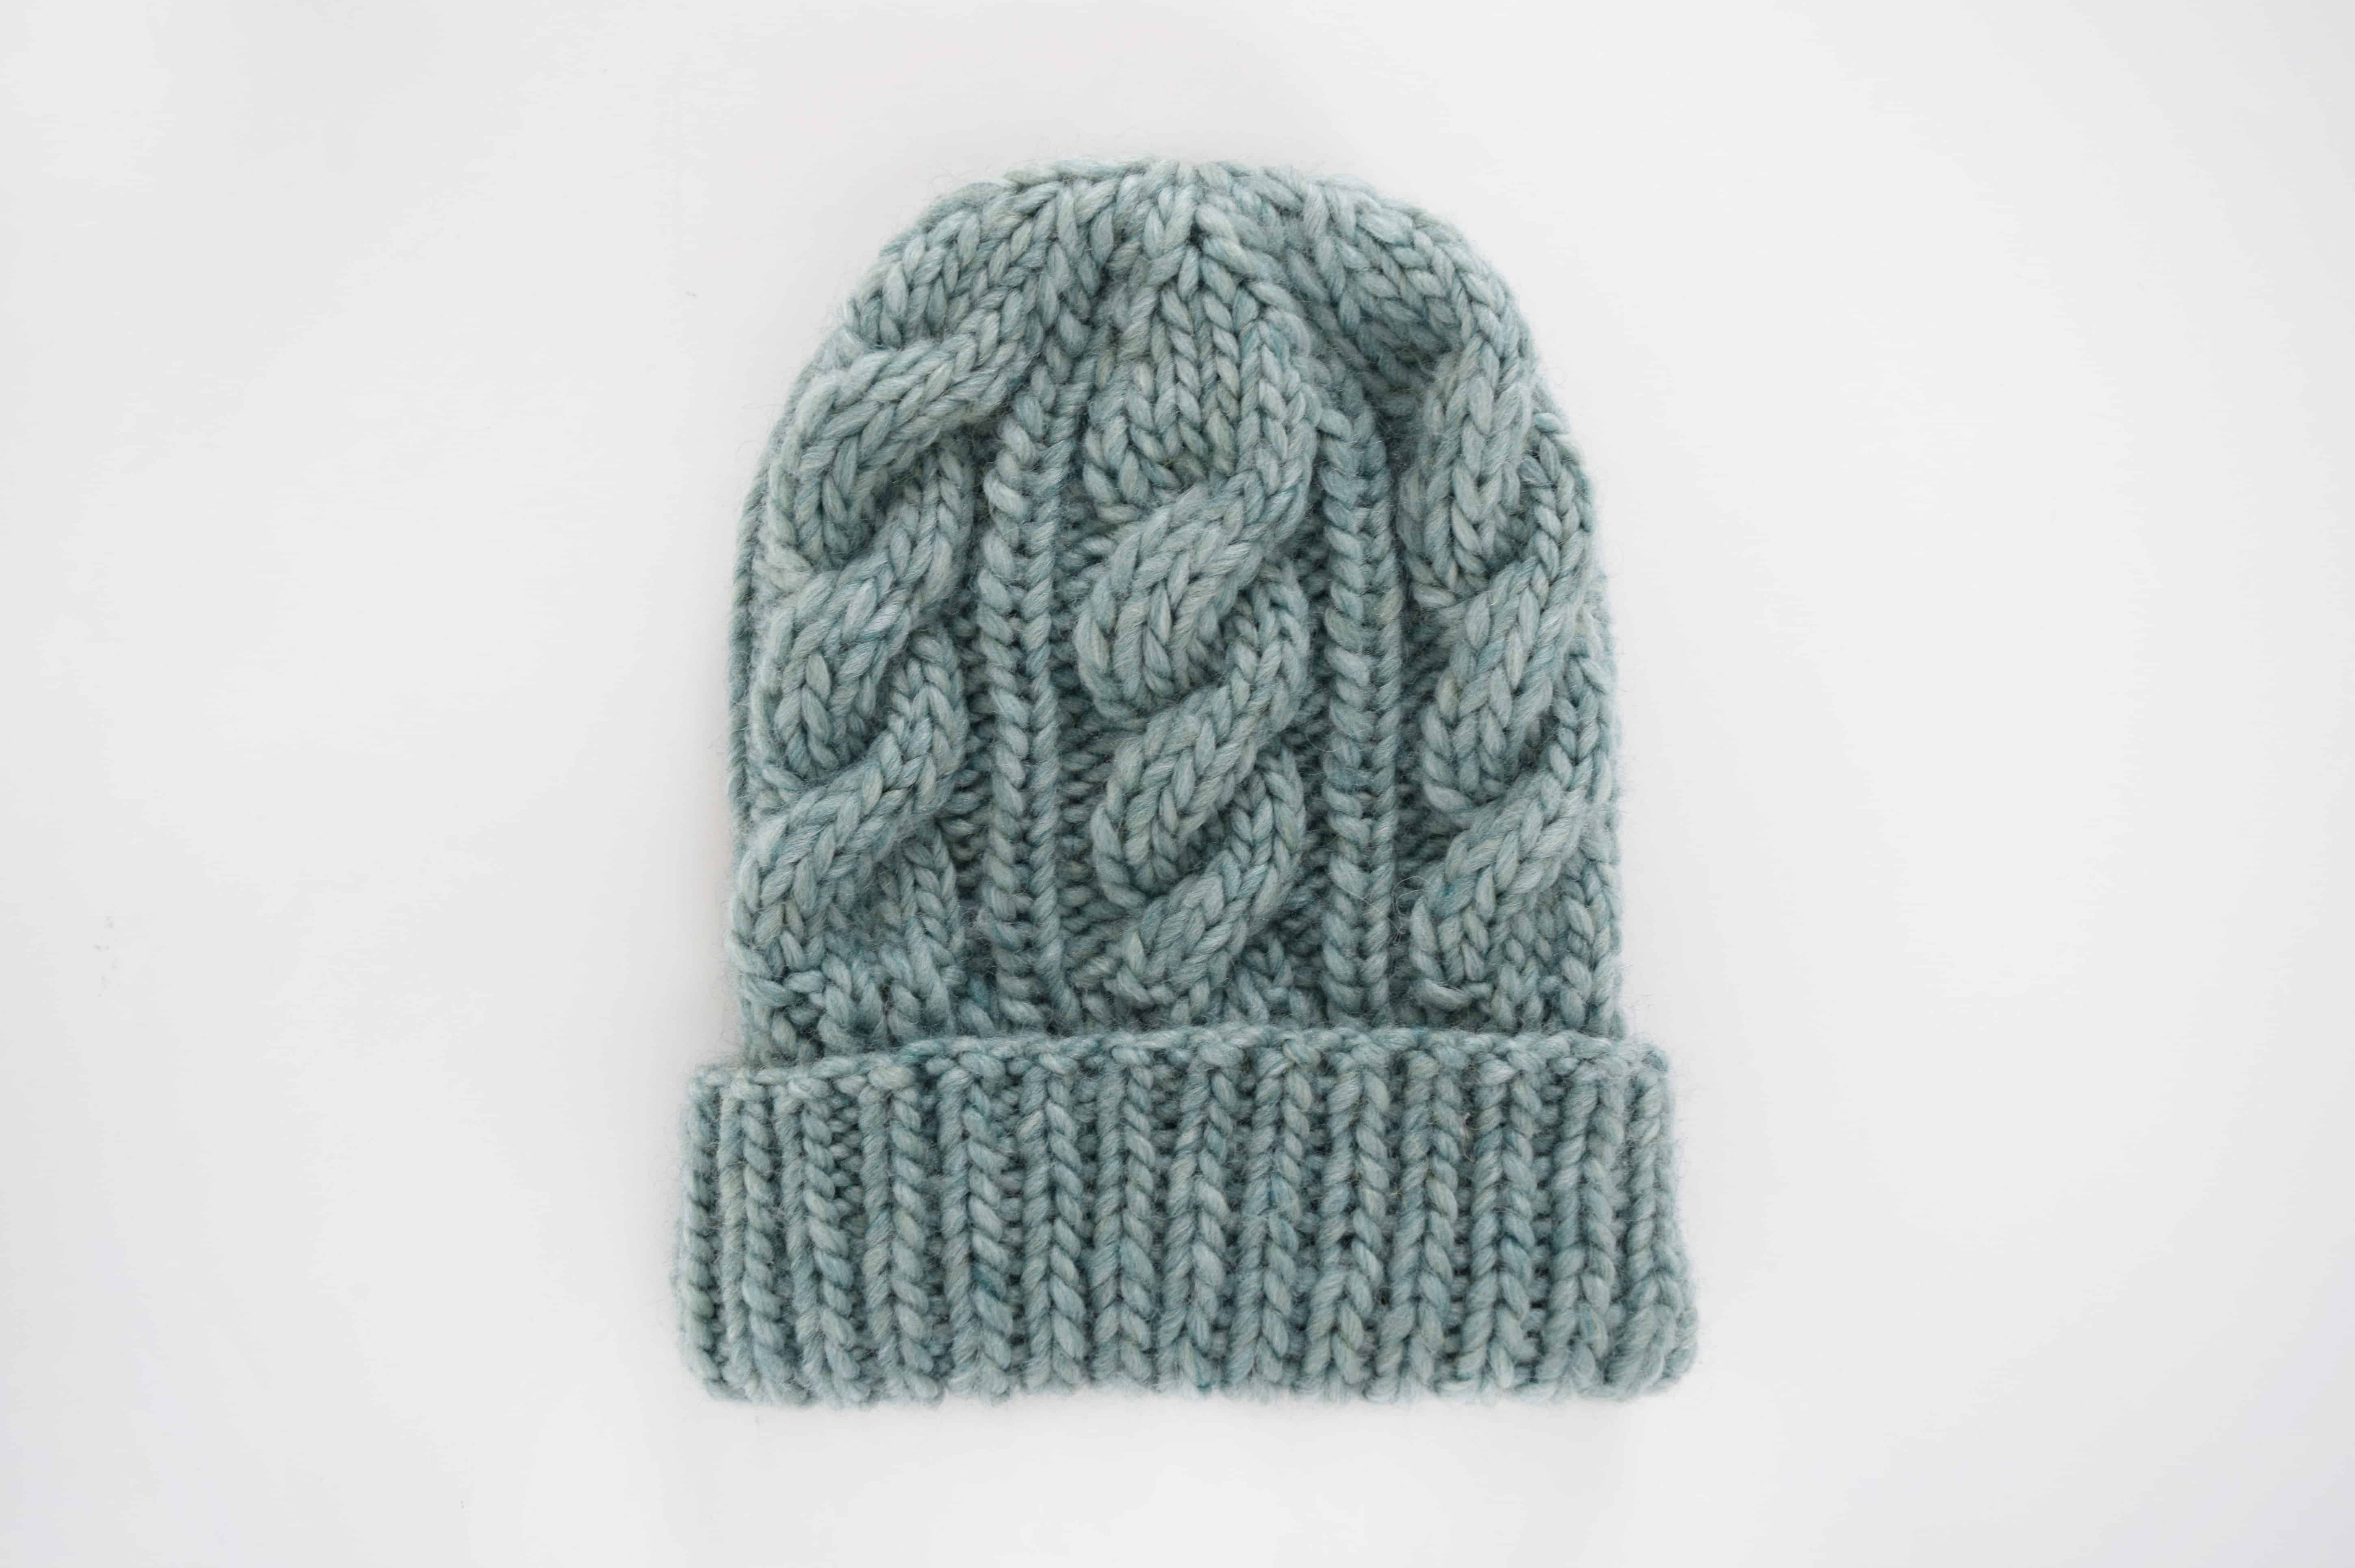
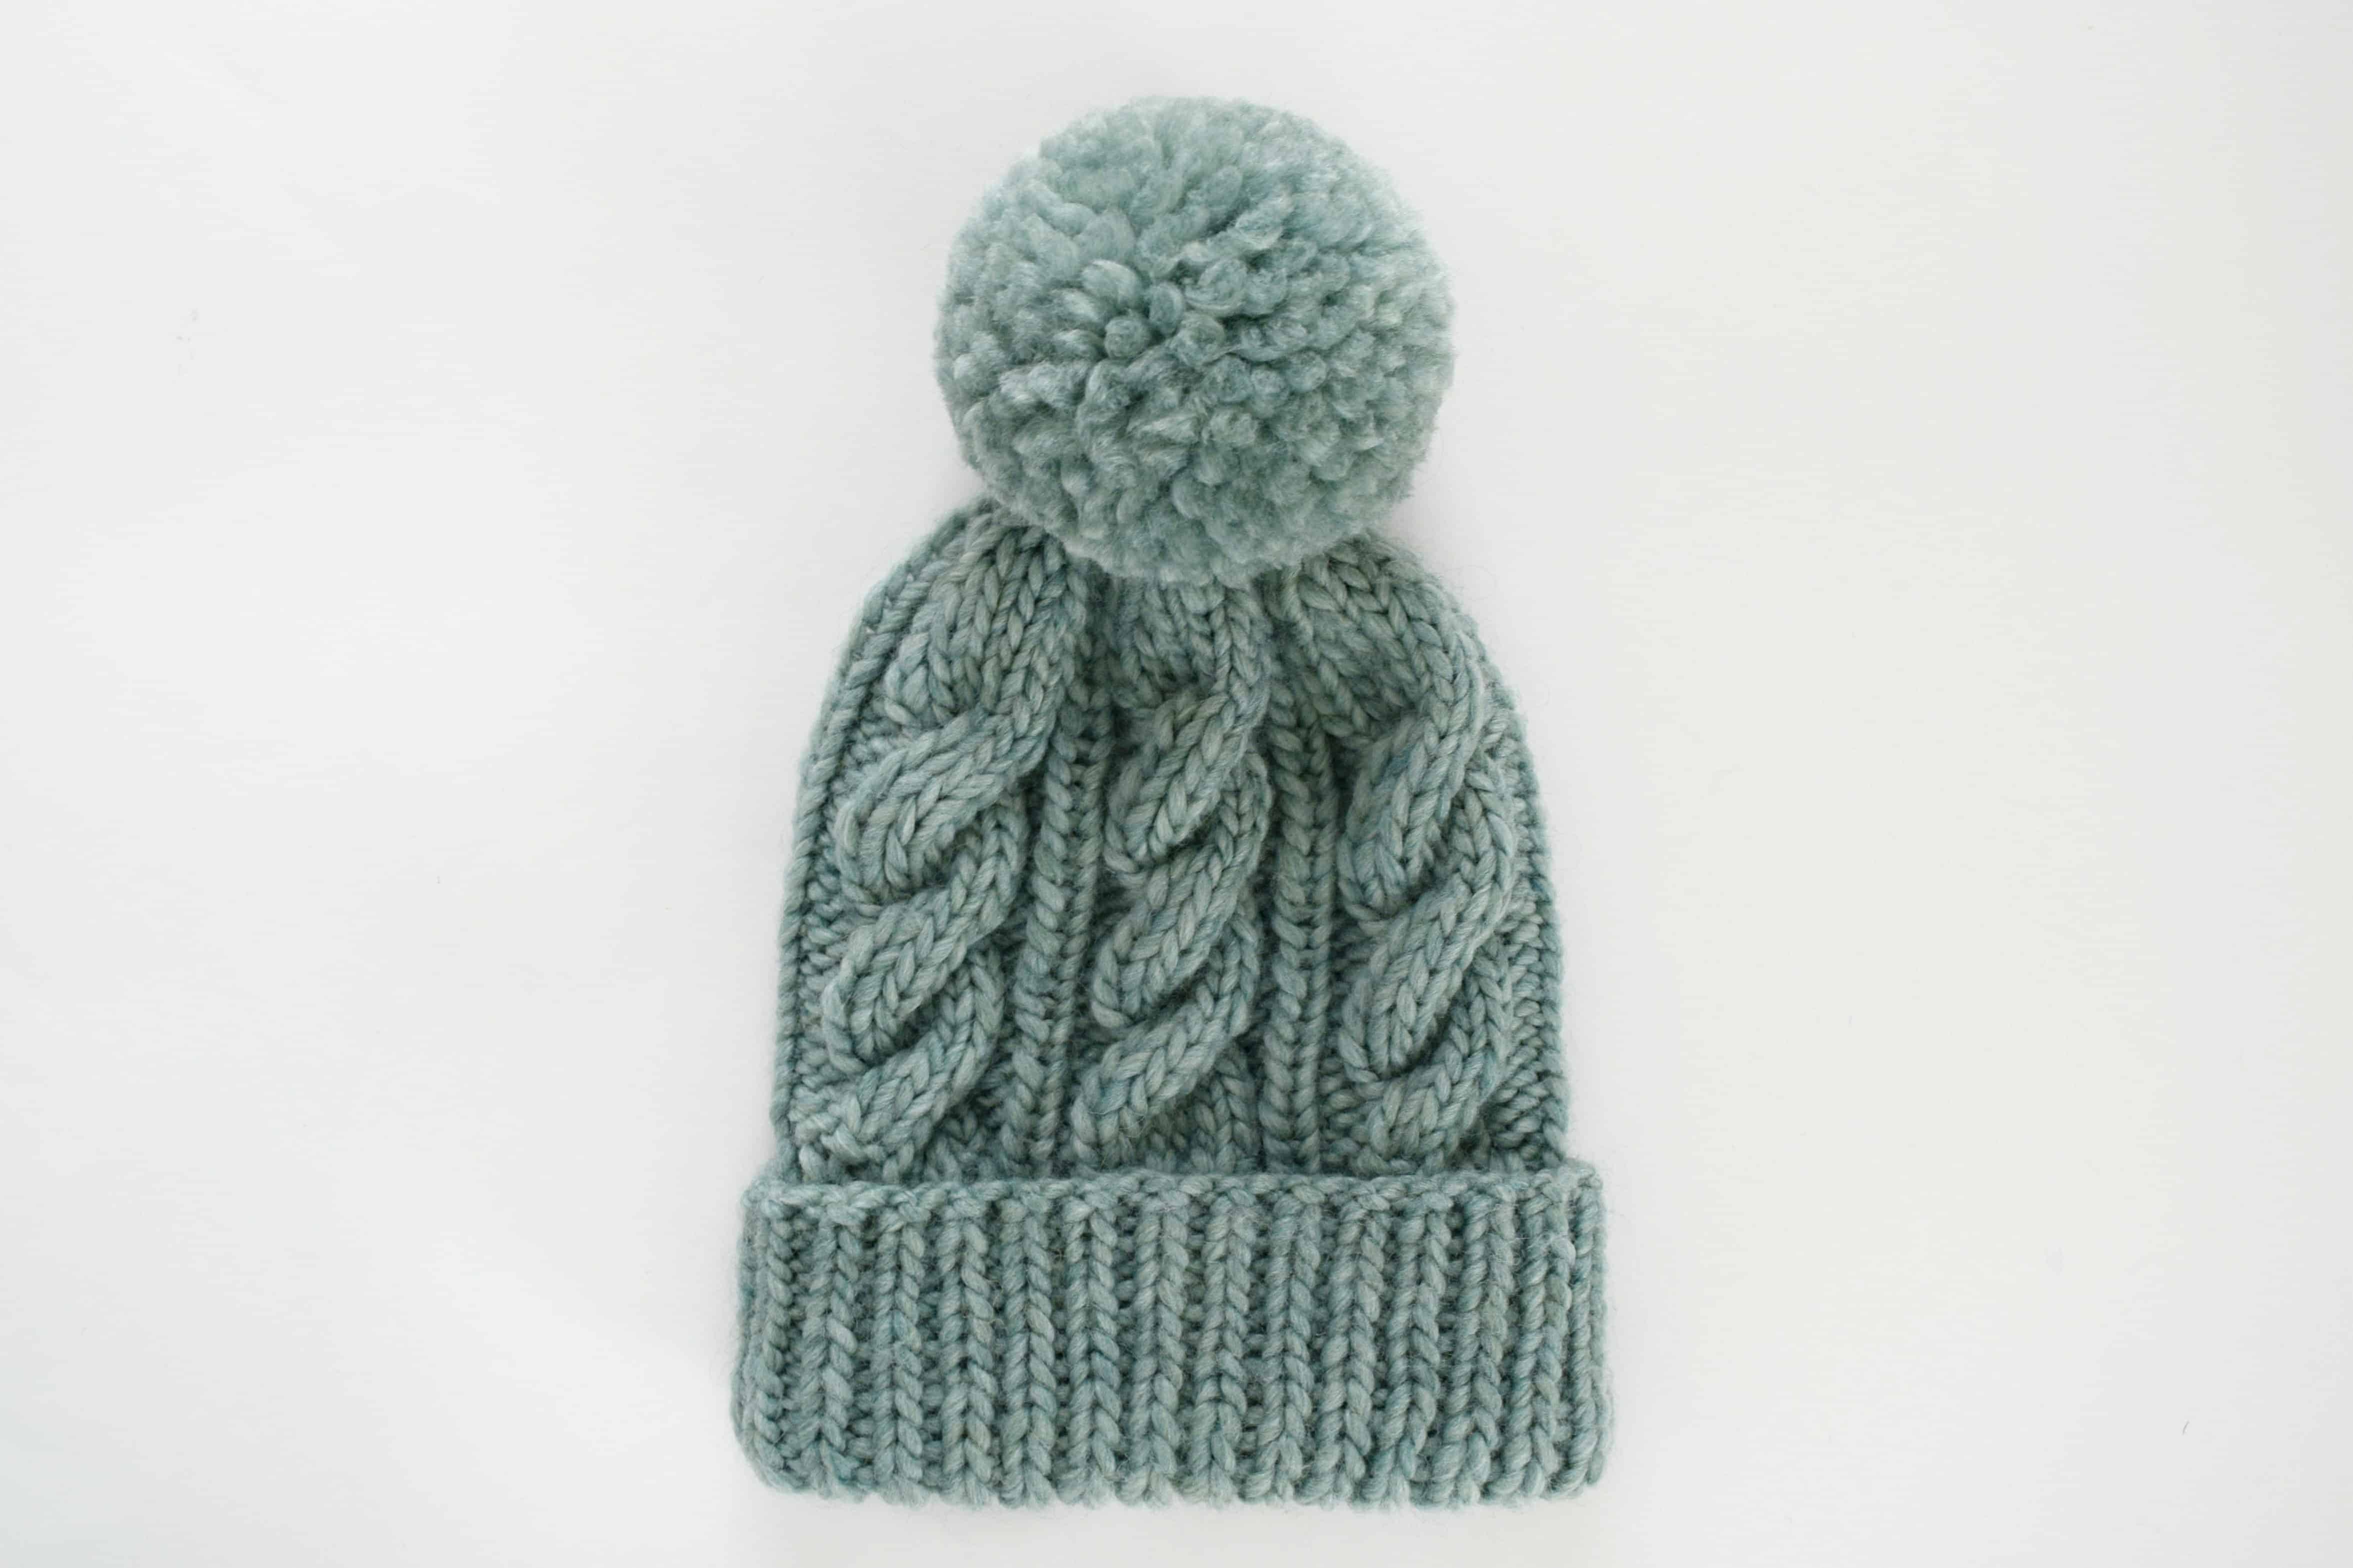
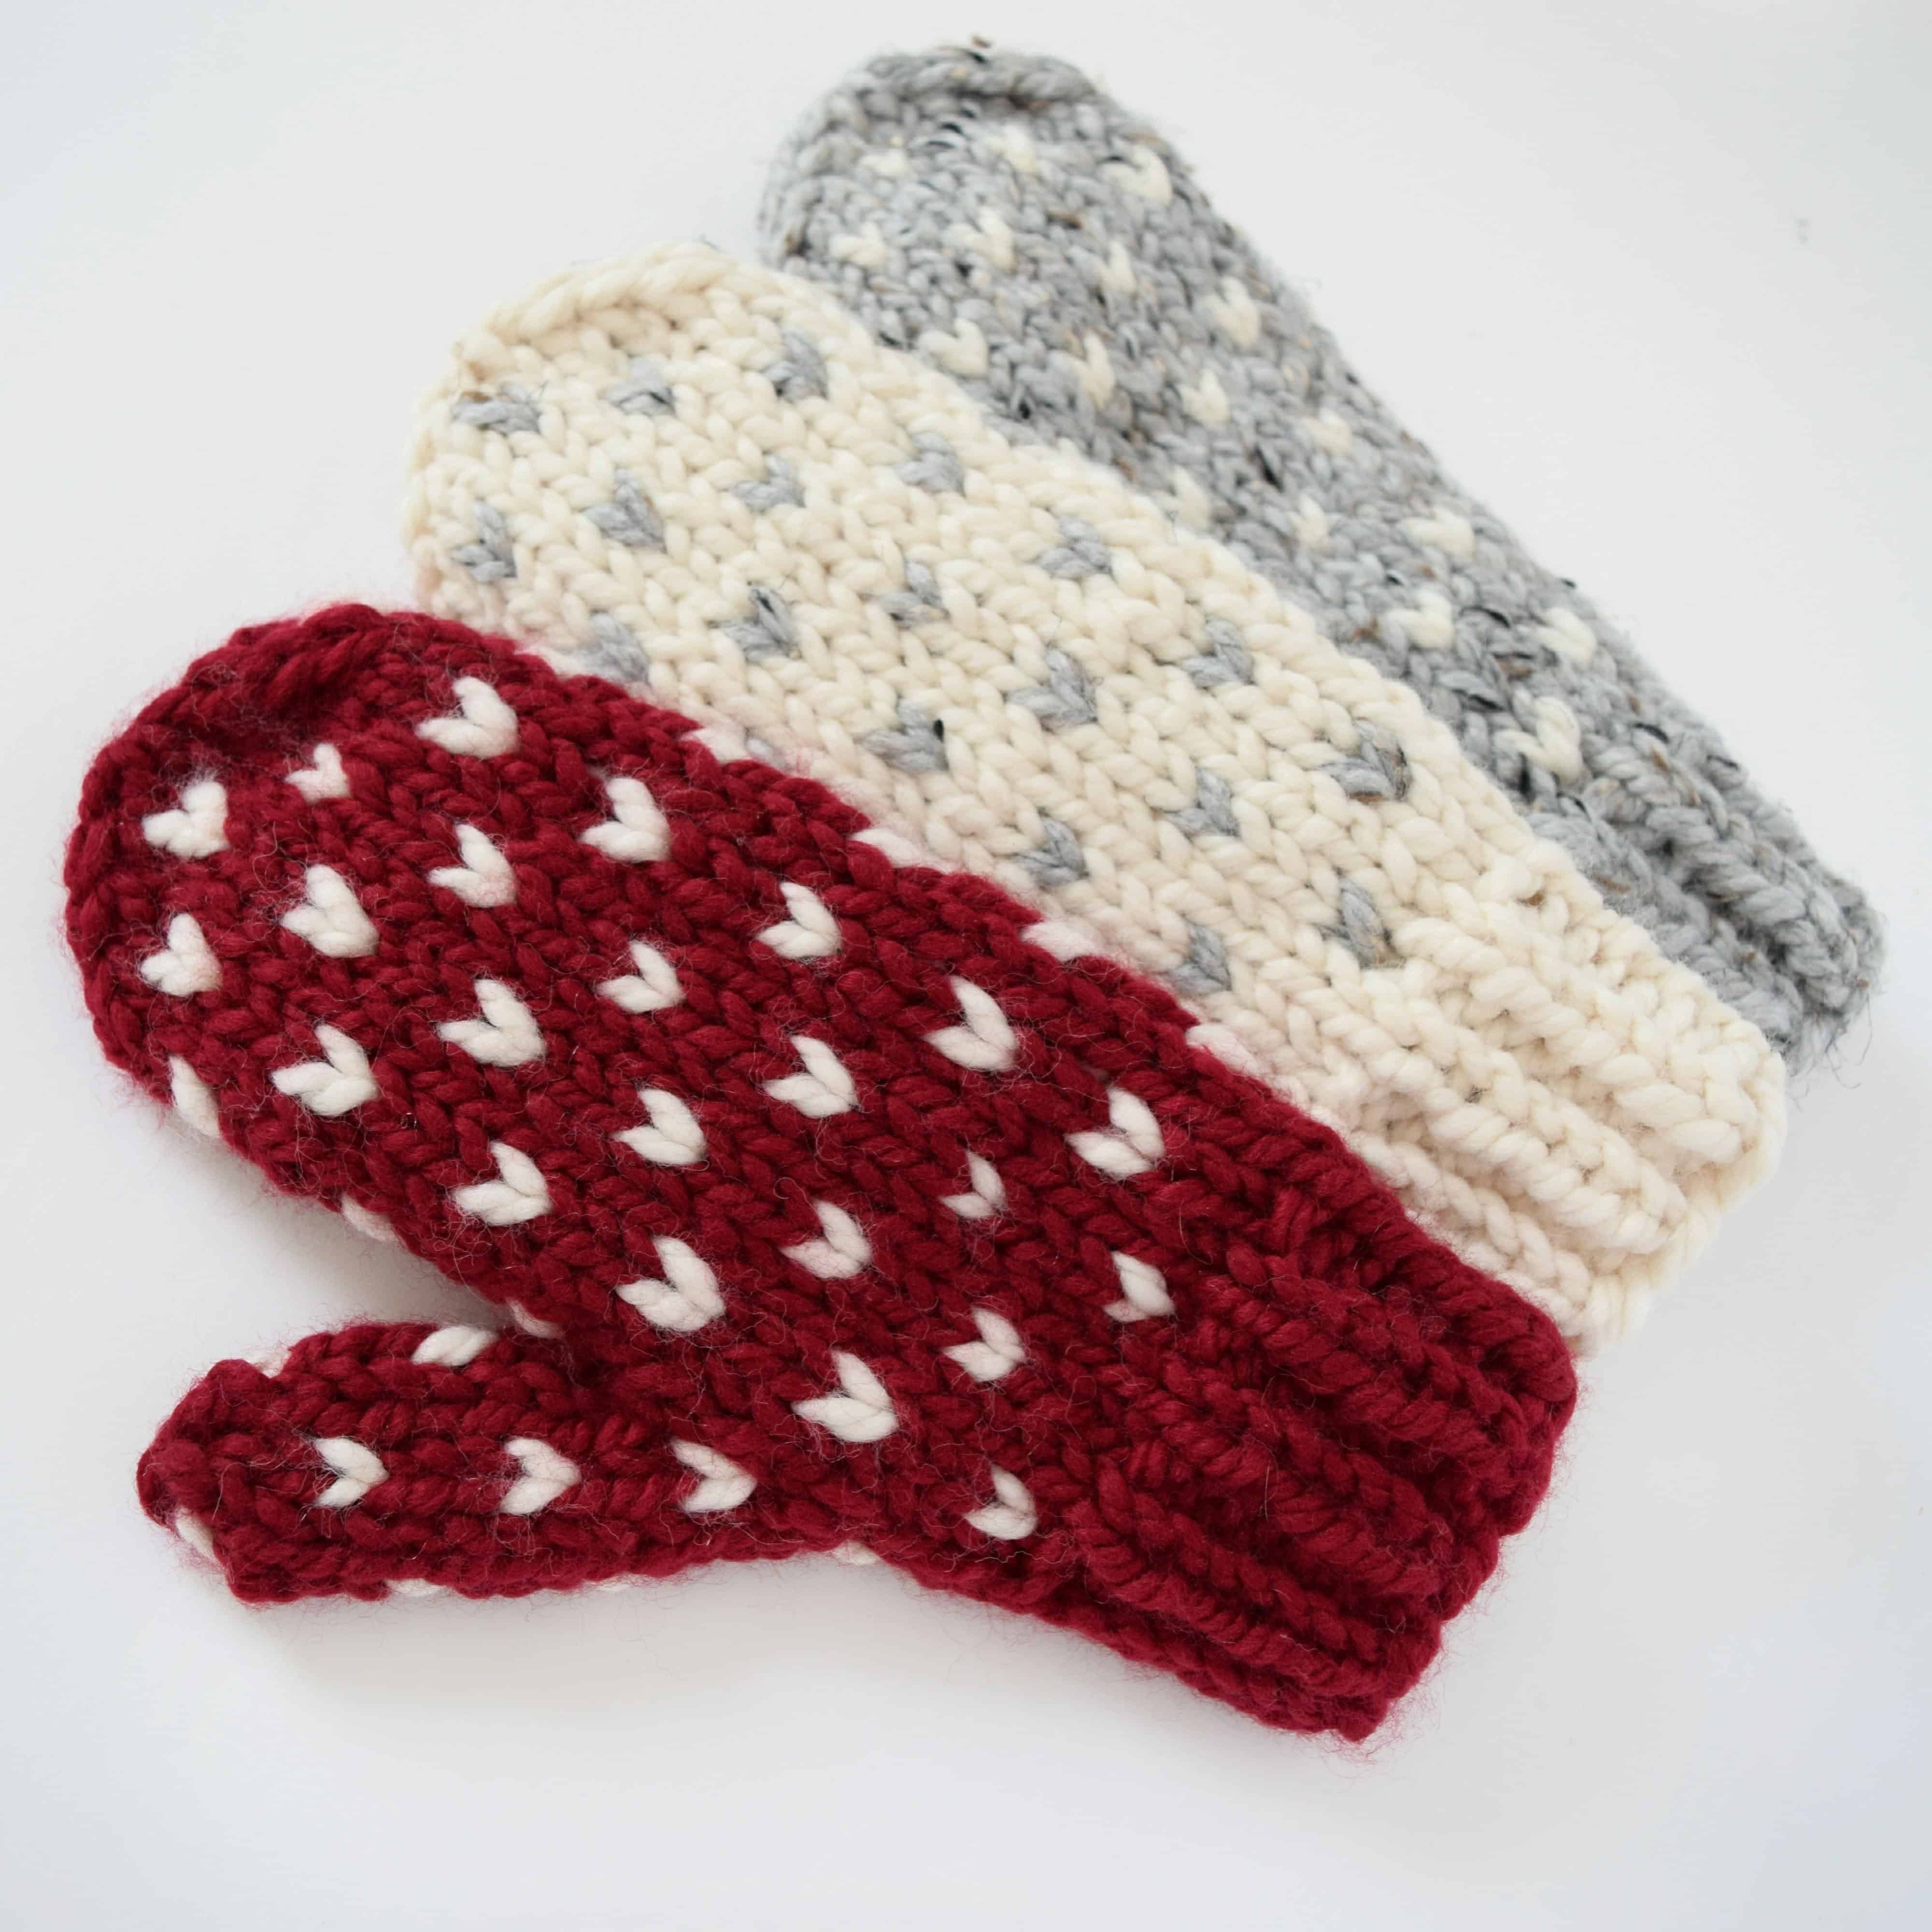
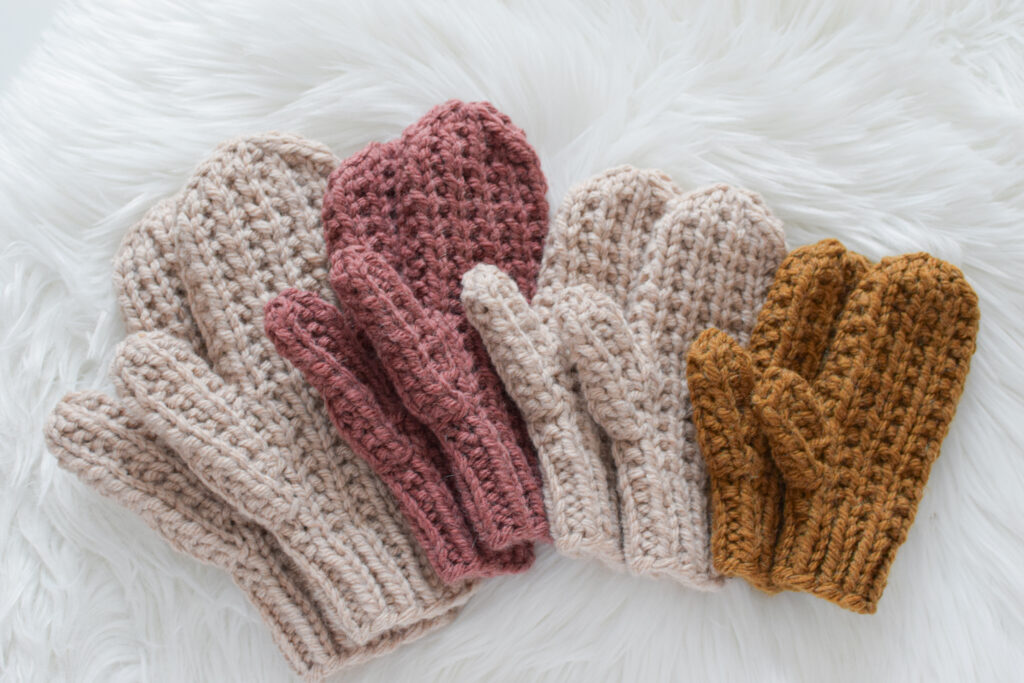
The Waffle Knit Mittens pattern offers a cozy and stylish accessory for colder days, combining the texture of the waffle stitch with the convenience of the magic loop knitting method. If you’ve been around for a bit, you may recognize these as my Broken Rib Mittens I made a while back for a sponsored post. Now, I’ve revamped the pattern using my favorite chunky weight yarn, Hue + Me, and included 4 different sizes for the whole fam!

The free pattern in this blog post will get you started knitting the Waffle Knit Mittens. However, for those who prefer a little more guidance, additional video tutorials that provide a step-by-step guide can be accessed through the purchase of the PDF knitting pattern OR the all inclusive knitting kit! Keep scrolling for the free pattern, or visit these links to purchase the printable PDF or kit.
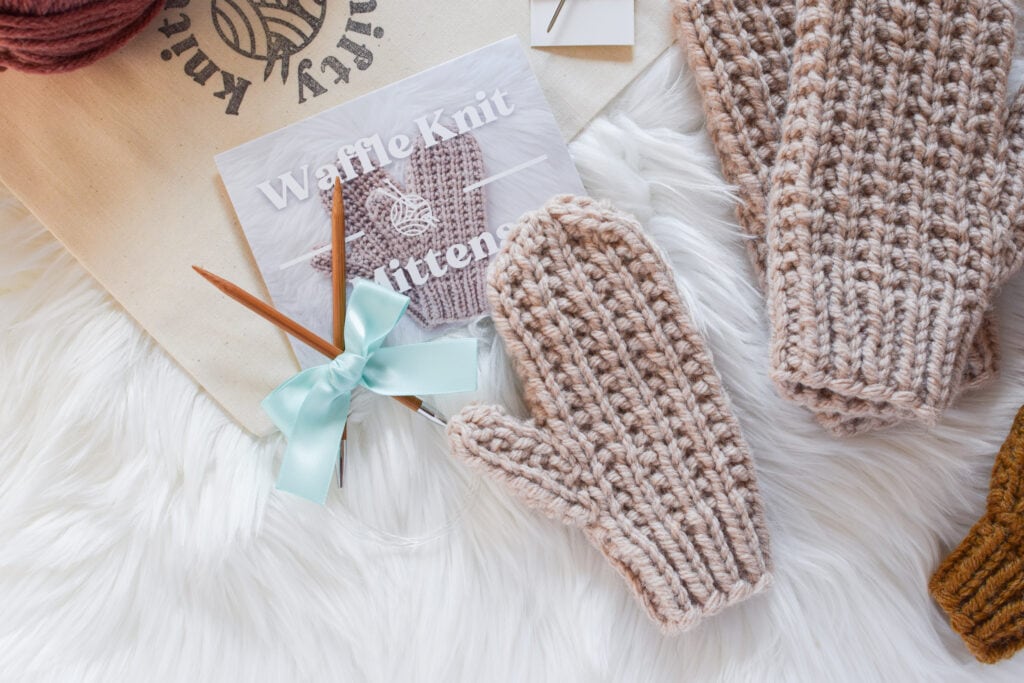
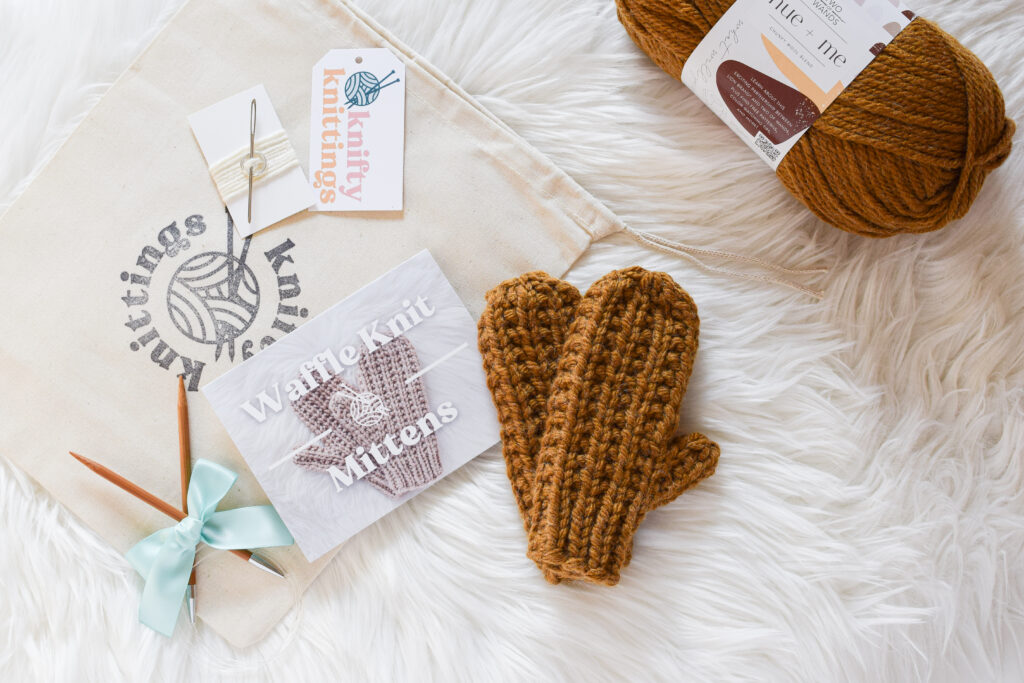
Cozy Waffle Knit Mittens in rich hues, showcasing a textured pattern and crafted with Hue and Me yarn. Ideal winter accessory for warmth and style, available in four sizes from child to adult. Perfect for chilly days and handmade comfort.
About the kit

The curated kit includes everything you need to get started. Additionally, the video tutorials will walk you through each step on how to knit the Waffle Knit Mittens.

– 1 skein of Lion Brand Hue + Me yarn (80% acrylic/20% wool)
– US 9/5.5 mm 40″ circular knitting needles (optional)
– Yarn needle
– 2 stitch markers
– Scrap yarn
– Written pattern
– Video library access
– All packaged in a hand stamped project bag

This is a level 4 (intermediate to advanced) knitting kit. You should be familiar and confident with the knit and purl stitches, how to knit in the round using the magic loop method, and also basic increases and decreases.

About the pattern

This pattern is written in four sizes, ranging from child to adult. Particularly, the smallest size instructions are presented first, followed by the larger sizes enclosed in parentheses. It is knit using the magic loop method, though dpns can be substituted with the stitches divided equally across four needles.

Let’s get started!

Here’s are the details:

Yarn
39 (55) 60 (85) yds/36 (50.5) 55 (78) m Lion Brand Hue + Me or similar chunky (category 5) yarn

Needles
US 9/5.5 mm 40 in circular needle
(or size needed to obtain gauge)
Optional: Double pointed needles may also be used

Notions
2 Stitch markers
Tapestry needle for weaving in ends
Scrap yarn

Gauge
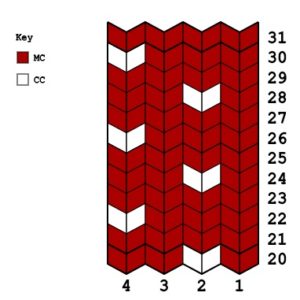
12 sts and 22 rnds = 4 in/10 cm in pattern

Sizes
Child S (Child M) Teen (Adult)
To fit age: 2-6 years (6-10 years) Teen (Adult)
To fit hand circumference: 6 (7) 7 (7.5) in/15.25 (17.75) 17.75 (19) cm

Abbreviations
CO – cast on
k – knit
k2tog – knit 2 together
m1L – make 1 left leaning increase
m1R – make 1 right leaning increase
p – purl
pm – place marker
rnd(s) – round(s)
sl – slip
sm – slip marker
ssk – slip, slip, knit slipped sts together
st(s) – stitch(es)

Pattern
Cuff:

Please note: Double pointed needles may also be used by dividing stitches evenly over 4 needles. 

Using the magic loop method, CO 16 (20) 20 (24) sts with the long tail cast on and join in the rnd, being careful not to twist sts.

Work in k1, p1 rib for 6 (7) 7 (8) rnds. 

Begin working in waffle knit pattern:

1st rnd: Knit.

2nd rnd: *k1, p1, repeat from * to end of rnd.

These 2 rnds form waffle knit pattern.

Repeat previous 2 rnds 0 (1) 1 (1) times more.

Thumb Gusset:

1st rnd: k7 (9) 9 (11) sts, (now there is 1 st left on the front needle), pm, m1R, k1, m1L, pm, k to end of rnd (2 sts increased).

2nd rnd: *k1, p1, repeat from * to 1 st before m, k1, sm, k1, p1, k1, sm, *k1, p1, repeat from * to end of rnd.

3rd rnd: k to marker, sm, m1R, k to next marker, m1L, sm, k to end of rnd (2 sts increased).

4th rnd: *k1, p1, repeat from * to end of rnd.

5th rnd: Repeat rnd 3 (2 sts increased).

6th rnd: *k1, p1, repeat from * to 1 st before m, k1, sm, [k1, p1] 3 times, k1, sm, *k1, p1, repeat from * to end of rnd.


Child S – continue to separate for thumb.


Child M and Teen sizes only:

7th rnd: Knit.

8th rnd: Repeat rnd 6

Teen size only:

Repeat rnds 7 and 8 once more.

Adult size only:

7th rnd: k to marker, sm, m1R, k to next marker, m1L, sm, k to end of rnd (2 sts increased).

8th rnd: *k1, p1, repeat from * to end of rnd.

9th rnd: Knit.

10th and 11th rnds: Repeat rnds 8 and 9.

12th rnd: *k1, p1, repeat from * to end of rnd.

Separate for thumb – All sizes:

Next rnd: k to marker and remove marker, place 7 (7) 7 (9) gusset sts onto scrap yarn. Remove next marker. Cast on 1 st using the backwards loop cast on. 8 (10) 10 (12) sts should be on each needle. k to end of rnd. 

Next rnd: *k1, p1, repeat from * to end of rnd. 

Next rnd: Knit.

Repeat previous 2 rnds until mitten measures 4.5 (5) 5.75 (6.5) in/11.5 (13) 14.5 (16.5) cm from the top of the cuff OR until the mitten measures .5 (.75) .75 (1) in/1.25 (2) 2 (2.5) cm less than desired length, ending after a k1, p1 rnd.

Decreases:

1st rnd: *ssk, k4 (6) 6 (8) sts, k2tog, repeat from * once more (4 sts decreased).

2nd rnd: *ssk, [p1, k1] 1 (2) 2 (3) times, k2tog, repeat from * once more (4 sts decreased).

Child M, Teen and Adult sizes only:

3rd rnd: *ssk, k(2) 2 (4) sts, k2tog, repeat from * once more (4 sts decreased).

Adult size only:

4th rnd: *ssk, p1, k1, k2tog, repeat from * once more (4 sts decreased).

All sizes:

Cut yarn, leaving an 8 in tail. Weave tail through remaining 8 sts and draw to close top of mitten.

Thumb:

Place the 7 (7) 7 (9) sts from scrap yarn onto needles. Pick up and knit 1 st from the cast on st edge.

1st rnd: Knit.

Child S, Child M and Teen sizes only:

2nd rnd: *p1, k1, repeat from * to end of rnd.

Adult size only:

2nd rnd: *k1, p1, repeat from * to end of rnd.

All sizes:

Repeat previous 2 rnds 1 (2) 3 (4) times more.

Next rnd: *ssk, k 0 (0) 0 (1), k2tog, repeat from * once more.

Cut yarn, weave tail through remaining 4 (4) 4 (6) sts and draw to close top of thumb.

Turn mitten inside out, weave in all ends, and use the tail from the picked up st to close the gap near the base of the thumb. Repeat all steps for the second mitten.

I hope you enjoy knitting the Waffle Knit Mittens! Also, feel free to share it by pinning the image below. I’d love to see your projects on Instagram! Use the #kniftyknittings hashtag and feel free to tag me @kniftyknittings. Check out the matching headband kit here!

Cozy Waffle Knit Mittens in rich hues, showcasing a textured pattern and crafted with Hue and Me yarn. Ideal winter accessory for warmth and style, available in four sizes from child to adult. Perfect for chilly days and handmade comfort.

Classic Cabled Hat & Mittens – Free Pattern

Classic Cabled Hat & Mittens – Free Pattern

Friends, I’m so excited to share this new free pattern with you! I’m thrilled to be collaborating with the wonderful people at Yarnspirations for this pattern set.

I used their super soft Bernat Roving, a single ply wool/acrylic blend! You can find it here, and Yarnspirations has generously provided a coupon code for 20% off from March 13th to 19th with the code KNIFTYBERNATROVING20 – thank you Yarnspirations!

This cozy hat and mitten set features a classic cable pattern with alternating cable sections for added interest. The fold over brim provides a little extra warmth, while allowing for an adjustable fit.

You can find the printable ad-free version of the pattern here.

Save it for later to your Ravelry queue here.

Feel free to share with your friends, and pin the image below!

Please see the following Tips & Tricks video for help with increases, decreases, how to C6B (cable 6 back) with and without a cable needle, and how to separate the thumb from the body of the mitten.

Click here for my magic loop tutorial.

Click here for my pom pom tutorial.

Yarn

232 yds/212 m (2 skeins) Bernat Roving (shown in Low Tide)
129 yds/119 m for hat
103 yds/93 m for mittens
*or similar bulky weight category 5 yarn

Needles

US 10.5/6.5 mm 16 in circular needle (or 40 in for magic loop method)
US 10.5/6.5 mm double pointed needles (optional – not necessary with magic loop method)

Please note: for a slouchier/less snug hat fit, or for head sizes larger than 22 in, use US 11/8.0 mm needles (hat only)

Notions

Stitch markers
Cable needle
Tapestry needle for weaving in ends
Pom pom maker – Clover Extra Large 4 ½ in (optional)
Scrap yarn or stitch holder

Gauge

13 sts and 18 rounds = 4in/10cm in Stockinette st with US 10.5/6.5 mm needles, or size needed to obtain gauge

Size

One – Women’s medium
To fit head circumference 21-22 in, hand circumference 7 ½ in and hand length 7 in

Abbreviations (see Tips and Tricks video for assistance with these techniques)

CDD – centered double decrease: slip 2 sitches together knitwise, knit 1, pass slipped stitches over.
cn – cable needle
CO – cast on
C6B – cable 6 back. Sl 3 sts to cn at back, k3, k3 from cn.
k – knit
k2tog – knit 2 together

m1L – make 1 left: lift horizontal bar between sts from front with left needle, k into back of loop.
m1R – make 1 right: lift horizontal bar between sts from back with left needle, k into front of loop
p – purl
pm – place marker
p2tog – purl 2 together
sl m – slip marker: move marker from left needle to right
ssk – slip, slip, knit slipped sts together
st(s) – stitch(es)

Hat

Brim:

With US 10.5/6.5 mm needles, CO 60 sts. Pm and join in the round, being careful not to twist sts. Work in k1, p1 rib for 6 in.

Body:

Increase round:
Round 1: *p2, k1, p2, k3, m1L, k2. Repeat from * to end of round. {66 sts on needles}

Refer to chart (or follow written directions below).

Round 2: *p2, k1, p2, k6. Repeat from * to end of round.
Round 3: Repeat round 2.
Round 4 (cable round A): *p2, k1, p2, C6B, p2, k1, p2, k6. Repeat from * to end of round.
Rounds 5-6: Repeat round 2.
Round 7 (cable round B): *p2, k1, p2, k6, p2, k1, p2, C6B. Repeat from * to end of round.

Round 8-10: Repeat round 2.
Round 11 (cable round A): Repeat round 4.
Round 12-13: Repeat round 2.
Round 14 (cable round B): Repeat round 7.

Repeat rounds 8-14 once more (twice more for a slouchier fit).

Repeat round 2 twice more.

Decreases:

Use the magic loop method or divide sts over dpns when sts become too tight on circulars.

Decrease round 1: *p2tog, k1, p2tog, ssk, k2, k2tog, p2, k1, p2, k6. Repeat from * to end of round.
Round 2: *p1, k1, p1, k4, p2tog, k1, p2tog, ssk, k2, k2tog. Repeat from * to end of round.

Round 3: *p1, k1, p1, ssk, k2tog, p1, k1, p1, k4. Repeat from * to end of round.
Round 4: *p1, k1, p1, k2, p1, k1, p1, ssk, k2tog. Repeat from * to end of round.
Round 5: *CDD, k2tog. Repeat from * to end of round.

Cut yarn, leaving an 8 in tail. Weave tail through remaining 12 sts and draw to close top of hat. Weave in ends and block if desired.

Pom (optional):

With a 4 ½ in pom pom maker, wrap yarn around 7-8 times each side for a nice full pom. Attach pom to top of hat, weave ends back through pom and trim ends. Click here for my pom pom tutorial!

Right Mitten

Cuff:

Please note: Instructions are written with the magic loop method in mind (double pointed needles may also be used by dividing stitches evenly over 4 needles).

“Turn work” simply means to turn the mitten around to work the stitches on the other half of the mitten.

Using the magic loop method, CO 24 sts with the long tail method. Pull the cable halfway between the stitches and join in the round, being careful not to twist sts. Place a locking stitch marker to mark the beginning of the round.

Starting with a purl st, work in p1, k1 rib for 4 ½ in.

Round 1: k2, p2, k3, m1L, k2, p2, k1, m1R, turn work, k11, m1L, k1. {27 sts on needles}
Round 2: k2, p2, k6, p2, k2, turn work, k13.
Round 3: Repeat round 2.

Thumb Gusset:

Round 4: k2, p2, k6, p2, k2, pm, m1R, turn work, k1, m1L, pm, k12. {2 sts increased}
Round 5: k2, p2, k6, p2, k2, sl m, k to next marker, sl m, k12.
Round 6: k2, p2, k6, p2, k2, sl m, m1R, k to next marker, m1L, sl m, k12.
Round 7 (cable round): k2, p2, C6B, p2, k2, sl m, k to next marker, sl m, k12.
Round 8: Repeat round 6.
Round 9: Repeat round 5.
Round 10: Repeat round 6.

Rounds 11-13: Repeat round 5.
Round 14 (cable round): Repeat round 7.
Round 15: Repeat round 5
Round 16: k2, p2, k6, p2, k2, remove marker, place 9 gusset sts on scrap yarn, turn work and remove next marker. Cast on 1 st using the backwards loop cast on, k 12. {14 sts on front (cable side) needle, 13 sts on back needle}

Refer to chart (or follow written directions below).

Round 17: k2, p2, k6, p2, k2, turn work, k13.
Rounds 18-20: Repeat round 17.
Round 21 (cable round): k2, p2, C6B, p2, k2, turn work, k13.
Rounds 22-27: Repeat round 17.
Round 28 (cable round): Repeat round 21.
Rounds 29-31: Repeat round 17.

Decreases:

Round 32: k2, p2, ssk, k2, k2tog, p2, k2, turn work, k13.
Round 33: ssk, p2, k4, p2, k2tog, turn work, ssk, k to last 2 sts, k2tog.
Round 34: k1, p2, ssk, k2tog, p2, k1, turn work, ssk, k to last 2 sts, k2tog.

Round 35: ssk, p1, k2, p1, k2tog, turn work, ssk, k to last 2 sts, k2tog.
Round 36: k1, p1, k2tog, p1, k1, turn work, ssk, k to last 2 sts, k2tog.
Round 37: *ssk, k1, k2tog. Repeat from * once more.

Cut yarn, leaving an 8 in tail. Weave tail through remaining 6 sts and draw to close top of mitten.

Thumb:

Place 9 sts from scrap yarn onto needles. Pick up and knit 1 st from the cast on st edge. Place a locking stitch marker under the picked up st to mark the beginning of the round.

Work in Stockinette st for 2 ¼ in.

Decrease round: *ssk, k1, k2tog. Repeat from * once more.

Cut yarn, weave tail through remaining 6 sts and draw to close top of thumb.

Turn mitten inside out and weave in all ends. Use the tail end from the picked up st to close the gap near the base of the thumb. Block, if desired.

Left Mitten

Cuff:

Repeat as for right mitten: CO 24 sts and work in p1, k1 rib for 4 ½ in.

Round 1: k11, m1R, k1, turn work, k2, p2, k3, m1L, k2, p2, k1, m1L. {27 sts on needles}
Round 2: k13, turn work, k2, p2, k6, p2, k2.
Round 3: Repeat round 2.

Thumb Gusset:

Round 4: k12, pm, m1R, k1, turn work, m1L, pm, k2, p2, k6, p2, k2. {2 sts increased}
Round 5: k12, sl m, k to next marker, sl m, k2, p2, k6, p2, k2.
Round 6: k12, sl m, m1R, k to next marker, m1L, sl m, k2, p2, k6, p2, k2..
Round 7 (cable round): k12, sl m, k to next marker, sl m, k2, p2, C6B, p2, k2.
Round 8: Repeat round 6.
Round 9: Repeat round 5.

Round 10: Repeat round 6.
Rounds 11-13: Repeat round 5.
Round 14 (cable round): Repeat round 7.
Round 15: Repeat round 5
Round 16: k12, remove marker, place 9 gusset sts on scrap yarn and cast on 1 st using the backwards loop cast on. Turn work and remove next marker, k2, p2, k6, p2, k2. {13 sts on front needle, 14 sts on back (cable side) needle}

Refer to chart (or follow written directions below).

Round 17: k13, turn work, k2, p2, k6, p2, k2.
Rounds 18-20: Repeat round 17.
Round 21 (cable round): k13, turn work, k2, p2, C6B, p2, k2.

Rounds 22-27: Repeat round 17.
Round 28 (cable round): Repeat round 21.
Rounds 29-31: Repeat round 17.

Decreases:

Round 32: k13, turn work, k2, p2, ssk, k2, k2tog, p2, k2.
Round 33: ssk, k9, k2tog, turn work, ssk, p2, k4, p2, k2tog.
Round 34: ssk, k7, k2tog, turn work, k1, p2, ssk, k2tog, p2, k1.
Round 35: ssk, k5, k2tog, turn work, ssk, p1, k2, p1, k2tog.
Round 36: ssk, k3, k2tog, turn work, k1, p1, k2tog, p1, k1.
Round 37: *ssk, k1, k2tog. Repeat from * once more.

Cut yarn, leaving an 8 in tail. Weave tail through remaining 6 sts and draw to close top of mitten.

Thumb:

Repeat as for right mitten thumb.

Turn mitten inside out and weave in all ends. Use the tail end from the picked up st to close the gap near the base of the thumb. Block, if desired.

I hope you’ve enjoyed this pattern as much as I enjoyed designing it! Just a reminder, you can purchase the ad-free printable version here, or pin it for later here!

Little Hearts Mittens – Free Pattern

Hello dear readers! Wow, it has been a minute since I’ve blogged! One of my big goals for 2018 is to really get back into blogging, and to share more free knitting patterns and tutorials.

So with that, here is my first free pattern of 2018!

These classic fair isle mittens are a merge of two of my favorite patterns – Magic Mittens and the Little Hearts Fair Isle Hat (hello, matching set!).

If these seem a bit advanced for you, I would recommend starting with Magic Mittens, which is a more basic mitten pattern geared towards knitters who are new to the magic loop method.

These mittens can be knit with either the magic loop method (my go-to), or with double pointed needles.

See the video below for my beginner magic loop tutorial:


Let’s get started!

To purchase the printable ad free version of this pattern, please click here.

PIN this pattern for later here.

See the following video for the step-by-step tutorial of this pattern:

Yarn
62 yds/57 m Lion Brand Wool-Ease Thick & Quick in Cranberry
14 yds/13 m Lion Brand Wool-Ease Thick & Quick in Fisherman
or similar super bulky yarn

Needles
US 13/9 mm 32 – 40 in circular needle
Or US 13/9 mm double pointed needles
(or size needed to obtain gauge)

Notions
1 Locking stitch marker
2 Stitch markers
Tapestry needle for weaving in ends
Scrap yarn

Gauge
10 sts and 12 rounds = 4 in/10 cm in Stockinette stitch

Sizes
Women’s medium
Finished measurements (unstretched):
8 in circumference by 8 ¼ in hand length (excluding cuff)

Abbreviations
CC – contrasting color
CO – cast on
k – knit
k2tog – knit 2 together
m1L – make 1 left leaning increase
m1R – make 1 right leaning increase

MC – main color
p – purl
pm – place marker
sl – slip
ssk – slip, slip, knit slipped sts together
st(s) – stitch(es)

Pattern

Cuff:

Please note: During the fair isle section, be sure to tack any floats that span more than 3 sts. Please see the video tutorial for more details.

Using the magic loop method (or double pointed needles) and MC, CO 18 sts with the long tail method.

Join in the round, being careful not to twist sts. Place a locking stitch marker to mark the beginning of the round.

With MC, work in k1, p1 rib for 8 rounds.

Round 9: with MC, *k8, m1L, k1. Repeat from * once more (2 sts increased).
Round 10: *k3 with MC, k1 with CC. Repeat from * to end of round.
Round 11: with MC, k to end of round.
Round 12: *k1 with MC, k1 with CC, k2 with MC. Repeat from * to end of round.

Thumb Gusset:

Round 13: with MC, k9, pm, m1R, k1, m1L, pm, k10 (2 sts increased).
Round 14: *k3 with MC (taking care to tack float – see video tutorial), k1 with CC. Repeat from * once more. k5 with MC (while slipping markers and tacking float), k1 with CC, *k3 with MC, k1 with CC. Repeat from * once more.
Round 15: with MC k9, sl marker, m1R, k3, m1L, sl marker k10.

Round 16: *k1 with MC, k1 with CC, k2 with MC. Repeat from * to end of round, while slipping markers.
Round 17: with MC, k9, sl marker, m1R, k5, m1L, sl marker, k10.
Round 18: *k3 with MC, k1 with CC. Repeat from * once more. *k4 with MC (tack float and sl m), k1 with CC. Repeat from * once more. *k3 with MC, k1 with CC. Repeat from * once more.
Round 19: with MC, k9, remove marker, place 7 gusset sts onto scrap yarn. Remove next marker. CO 1 st using the backwards loop cast on, k10.

Body:

Refer to fair isle chart, or continue following written instructions below.

Round 20: *k1 with MC, k1 with CC, k2 with MC. Repeat from * to end of round.
Round 21 (and all odd numbered rounds): with MC, k to end of round.
Round 22: *k3 with MC, k1 with CC. Repeat from * to end of round.
Round 24: *k1 with MC, k1 with CC, k2 with MC. Repeat from * to end of round.

Round 26: *k3 with MC, k1 with CC. Repeat from * to end of round.
Round 28: *k1 with MC, k1 with CC, k2 with MC. Repeat from * to end of round.
Round 30: *k3 with MC, k1 with CC. Repeat from * to end of round.
Round 31: with MC, k to end of round

Decreases:

Round 32: ssk with MC, k3 with MC, k1 with CC, k2 with MC, k2tog with MC, ssk with MC, k1 with MC, k1 with CC, k3 with MC, k1 with CC, k2tog with MC.
Round 33: with MC, *ssk, k4, k2tog. Repeat from * once more.
Round 34: with MC, *ssk, k2, k2tog. Repeat from * once more.

Cut yarn, leaving an 8 in tail. Weave tail through remaining 8 sts and draw to close top of mitten.

Thumb:

Place 7 sts from scrap yarn onto needles. With MC, pick up and knit 1 st from the cast on st edge. Place a locking stitch marker under the picked up st to mark the beginning of the round.

Round 1 (and all odd numbered rounds): with MC, k to end of round.
Round 2: *k2 with MC, k1 with CC, k1 with MC. Repeat from * once more.
Round 4: *k1 with CC, k3 with MC. Repeat from * once more.

Round 6: *k2 with MC, k1 with CC, k1 with MC. Repeat from * once more.
Round 8: *k1 with CC, k3 with MC. Repeat from * once more.
Round 9: with MC, *ssk, k2tog. Repeat from * once more.

Cut yarn, weave tail through remaining 4 sts and draw to close top of thumb.

Turn mitten inside out and use the end from the picked up st to close the gap near the base of the thumb.

Weave in remaining ends, and block (either steam or wet block).

Repeat all steps for the second mitten.

And there we go! A pair of super cozy, super cute fair isle mittens. I hope you enjoyed this pattern, and I would love to see your finished knits! Feel free to tag me on Instagram with the hashtag #kniftyknittings.

Subscribe to my newsletter below to be the first to hear about new patterns and tutorials!

Little Hearts Mittens - free knitting pattern and tutorial from www.kniftyknittings.com        #knitting #knittingpattern #mittens

Copyright © 2024 · Theme by 17th Avenue